Editing with Photoshop
So you have taken a pretty good photo with your phone or DSLR and want to make it better? Here are some useful post processing steps that I use when editing my photos!
|
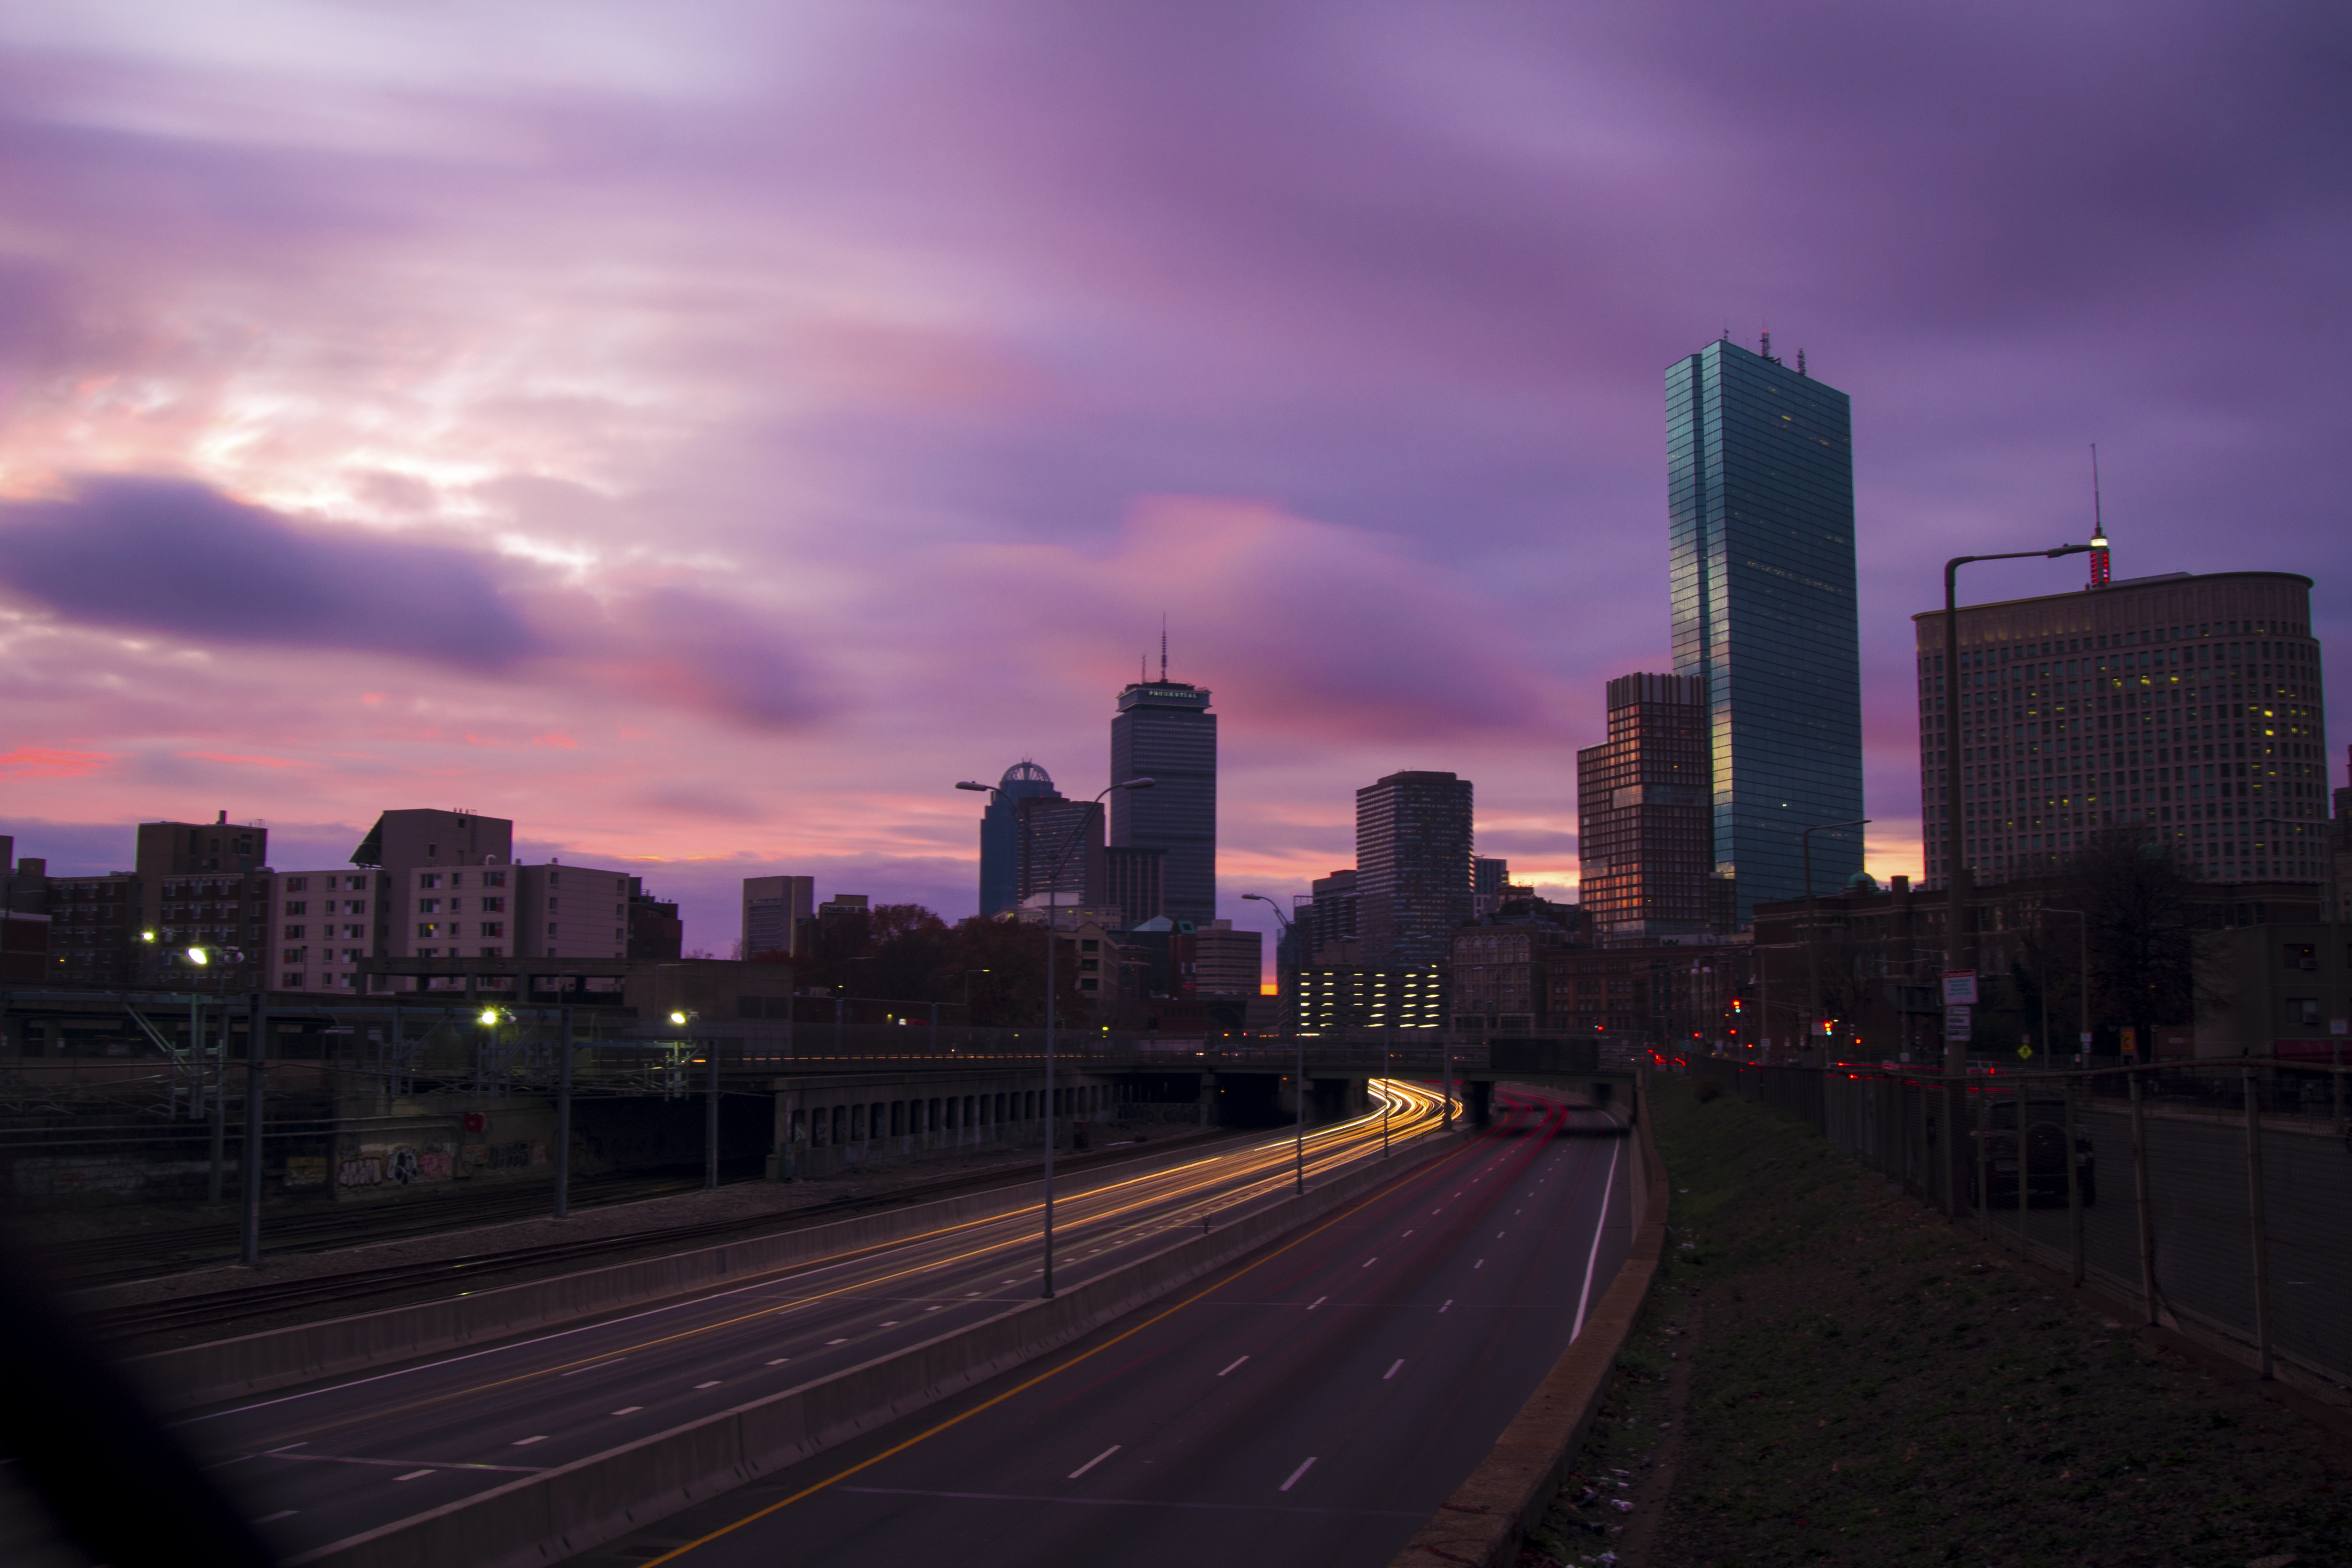
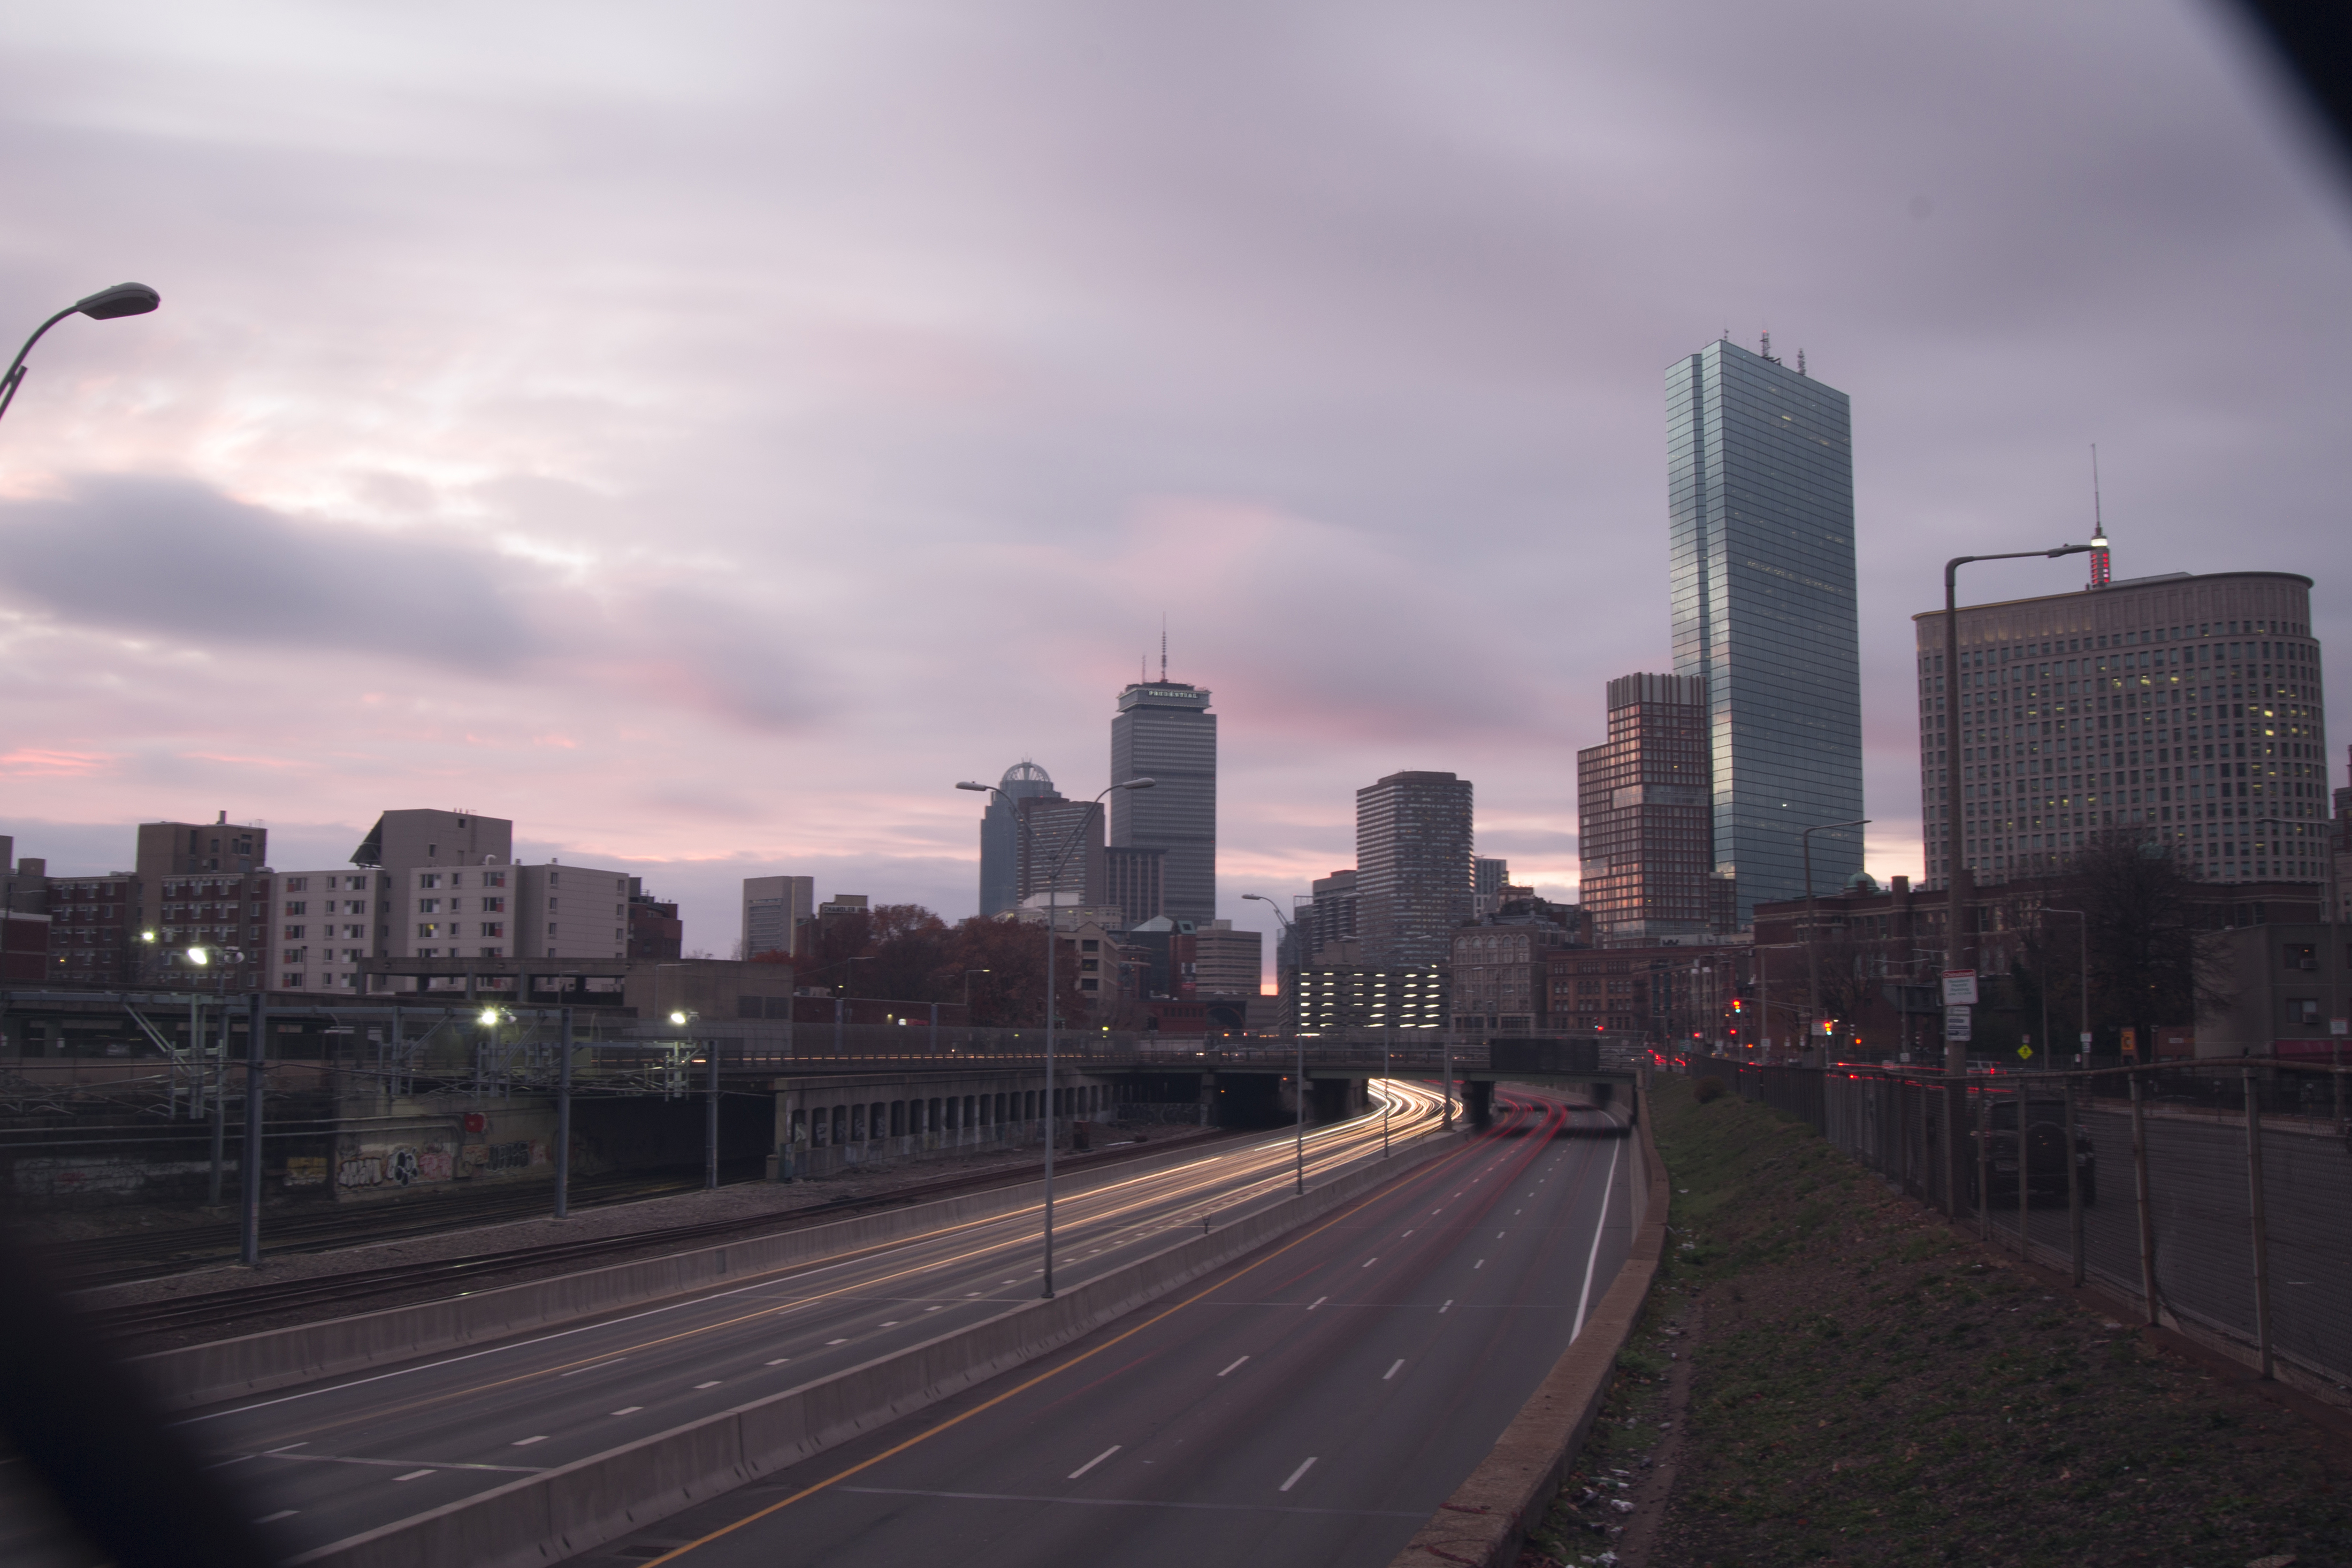
To show you some different Photoshop tools, I'll use one of my own photos and show you what I would do to edit it (download this image below). Let's start with this photo of the Boston skyline... Check out the before/after below! (I'll be using a sliding image display to show what each setting does to an image)
|
|---|
 After
After
 Before
|
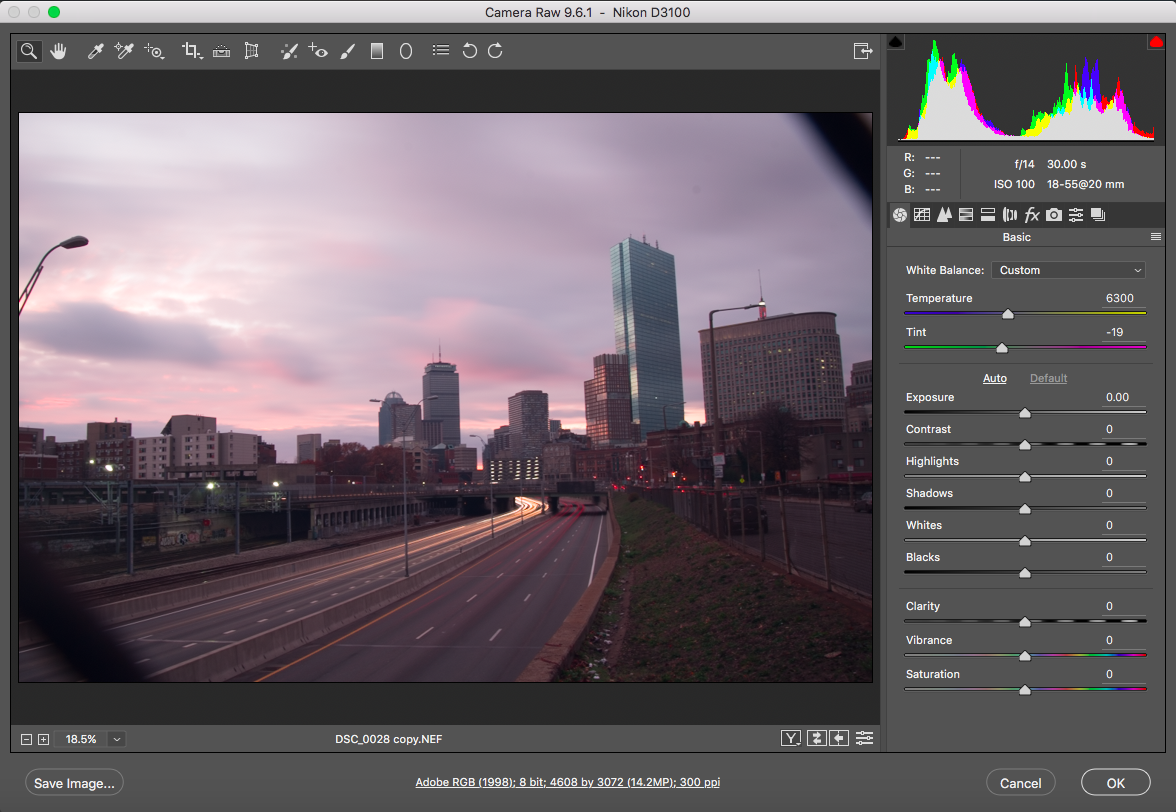
Go ahead and open that image in Photoshop. When you first open your RAW file in Photoshop, the camera raw screen will show up with many settings to use. (If you didn't shoot in RAW, you can use a Camera Raw Filter—filter > camera raw filter—to get the same effect) From here, you should start by looking at the histogram and seeing if the photo is over or underexposed. From the looks of this histogram, the photo is properly exposed, but the whites make the photo look overexposed.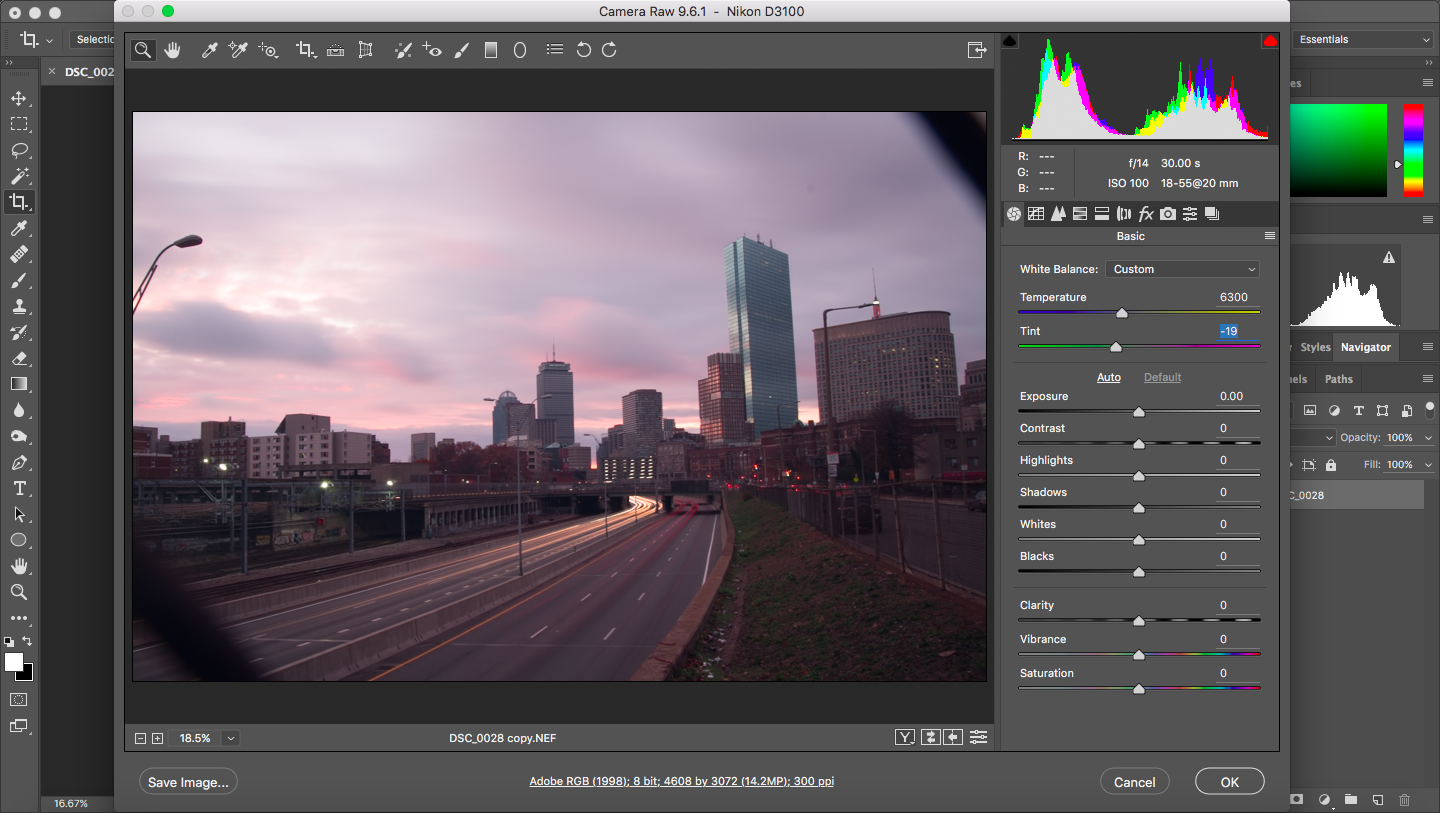
From here, I deceide if I should make the photo brighter or darker. Since this photo is pretty bright already, I will decrease the exposure to counter. This photo's colors are also looking a little muted and pale, so I bumped up the contrast a bit to better define the colors of the image. Notice how the exposure and contrast effect the histogram. 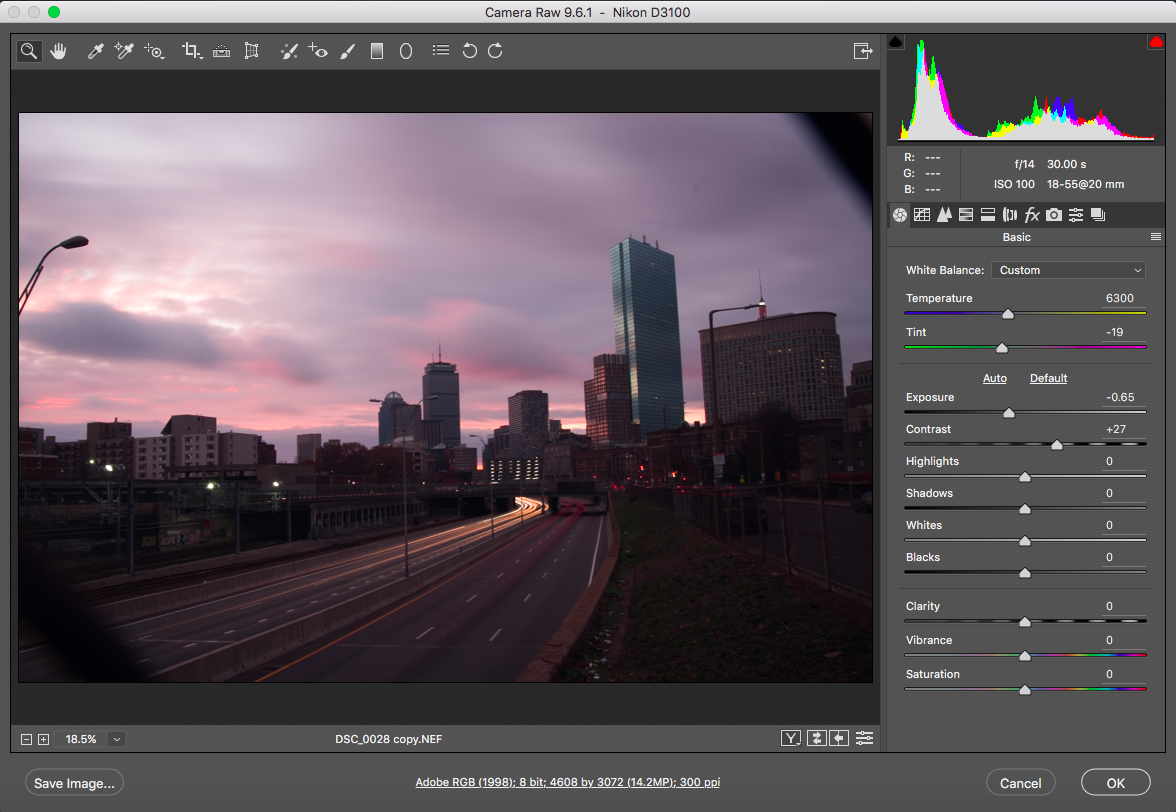 After
After
 Before
The next set of sliders in Camera RAW change the highlights, shadows, whites, and blacks of the image. Adding highlights and whites make the photo brighter while adding shadows and black make the image darker. I reduced the highlights of the image to give the sky more detail and make it look less washed out. The whites and blacks I kept relatively the same to maintain the look of the lights and darks of the rest of the photo. 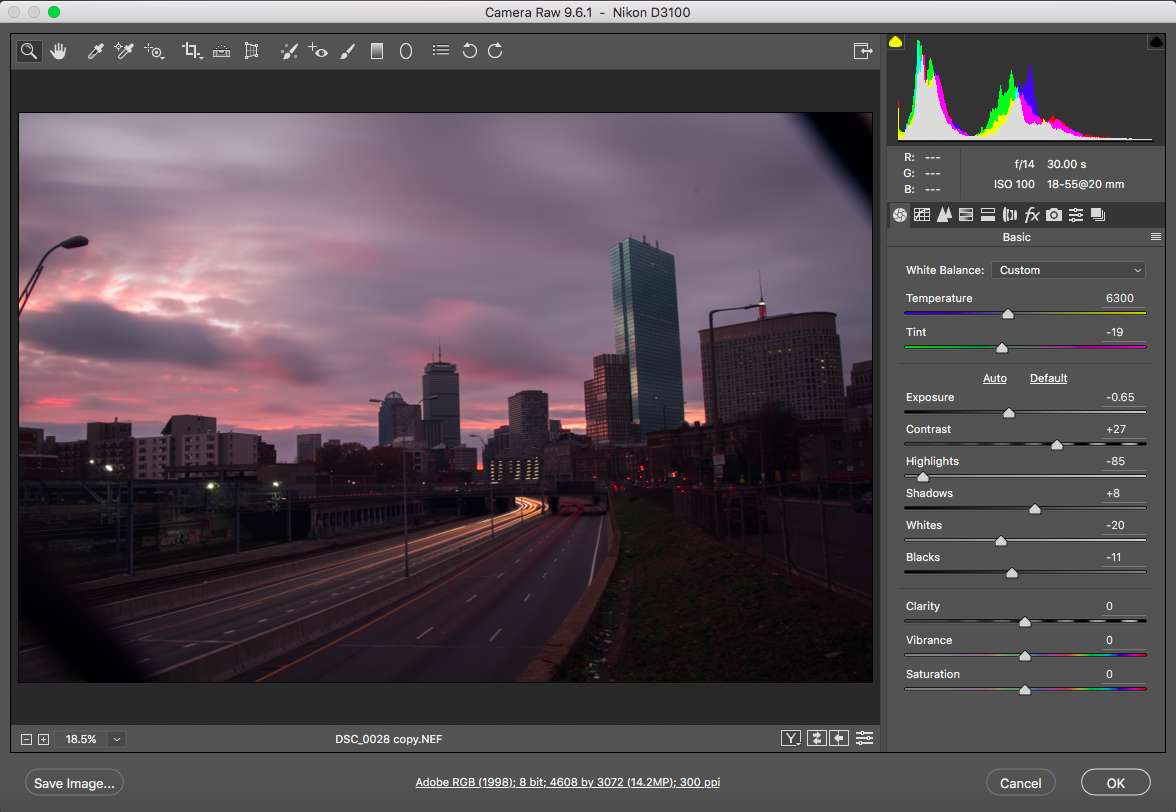 After
Before
After
Before
Now for the fun part—Vibrance and Saturation! These are some of my favorite settings to adjust because of the way it changes the colors. With this, I pumped them both up to give the dull colors more pop. When adjusting vibrance and saturation be careful not to overuse the settings, it will create a fake-looking image if you do. I also increased the clarity of this image to give it a little depth and structure. Just like vibrance and saturation, don't overuse clarity. 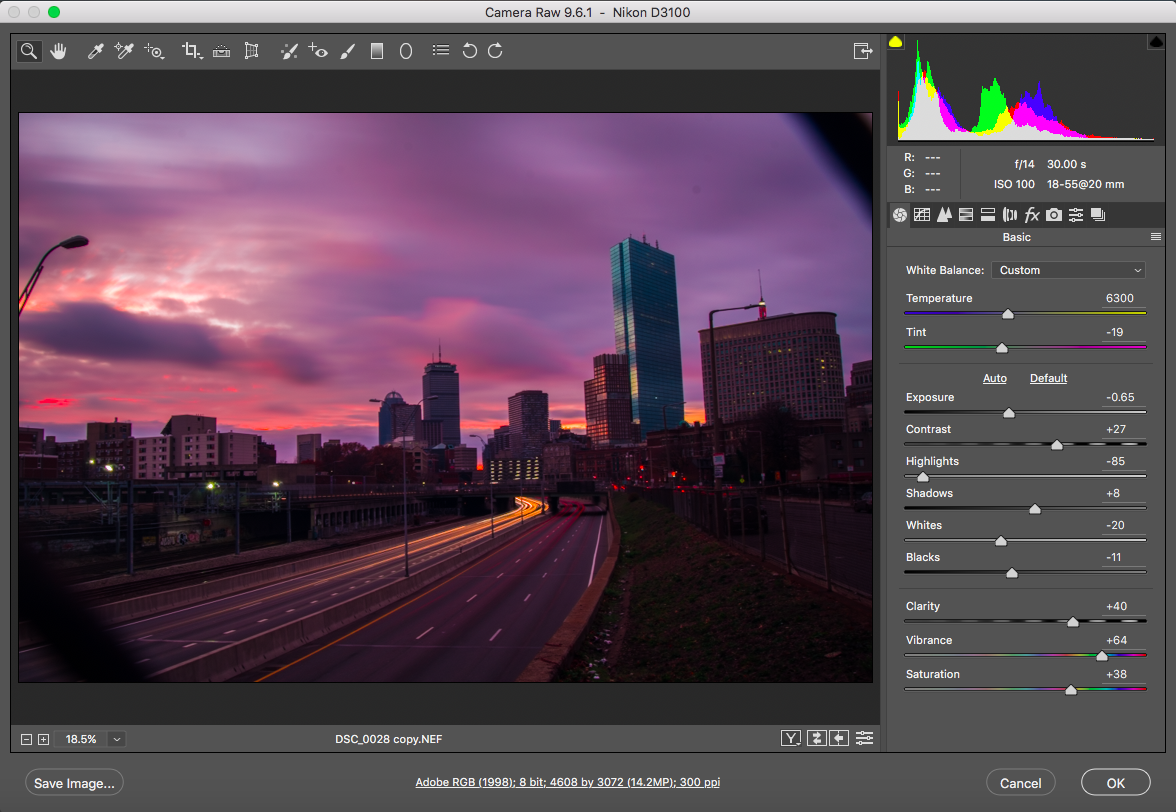 After
Before
After
Before
Now that we have finished adjusting the basics of the image, we can start to modify the photo. Hold shift while pressing the OK button to open the image as a smart object enabling you to edit these settings later. Notice how there are a few scattered dust spots in the image as well some unwanted objects in the way? We can easily take these out using the healing brush tool (J). Before removing these spots, we have to rasterize the layer. To do this, first duplicate the layer (⌘ + J) then right click (ctrl + click) then find the menu item "Rasterize Layer". Now that this layer is rasterized, select the healing brush tool and we can start taking out these spots. Look at the videos below to see what I'm talking about. *To use the spot healing brush tool (J), you have to define a source by holding option then a spot around the area you want to fill. To adjust the size of the brush, use the brackets [ or ]. Do this for all the spots that you see in the photo. *Fill command: (fn + shift + f5) *Now do the same thing with the street light. *Since most buildings are straght up and down, use a building with the straighten tool to level the image. Now that you have seen some of the basic ways I edit my photos, click below for some photography tips and tricks! |