Basic Terminology
Below are some terms used by photographers, you will need to know them to understand the basics of photography.
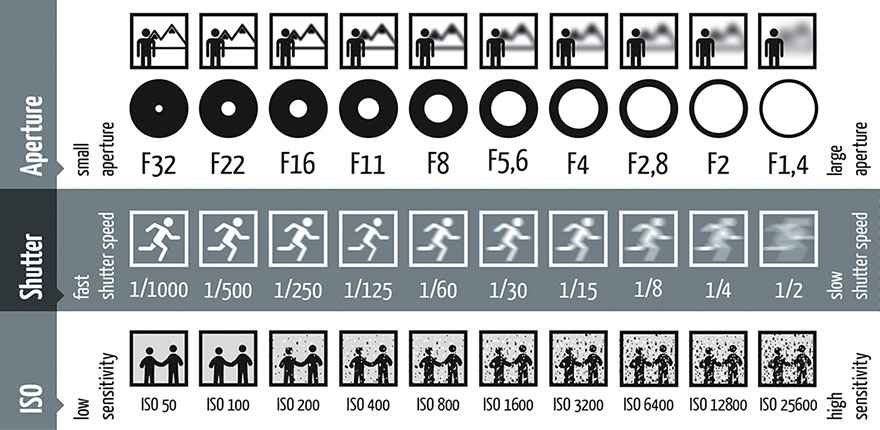
Aperture: On a camera, the aperture controls the opening of the lens and how much light it allows into the camera. Think of it like a door—An open door lets in more light than a closed door. Just like how a lens with a wide aperture lets in more light than one with a narrow aperture. On a camera, the aperture is measured in f-stops. A higher f-stop (like f/29.0) will let little light into the camera making a darker image and the background will be sharper. A lower f-stop (like f/4.5) will make the image brighter and the backgrond will be blurrier. Aperture is one of three main camera settings that change the brightness/exposure of an image. See the difference aperture change can make in the photos below: 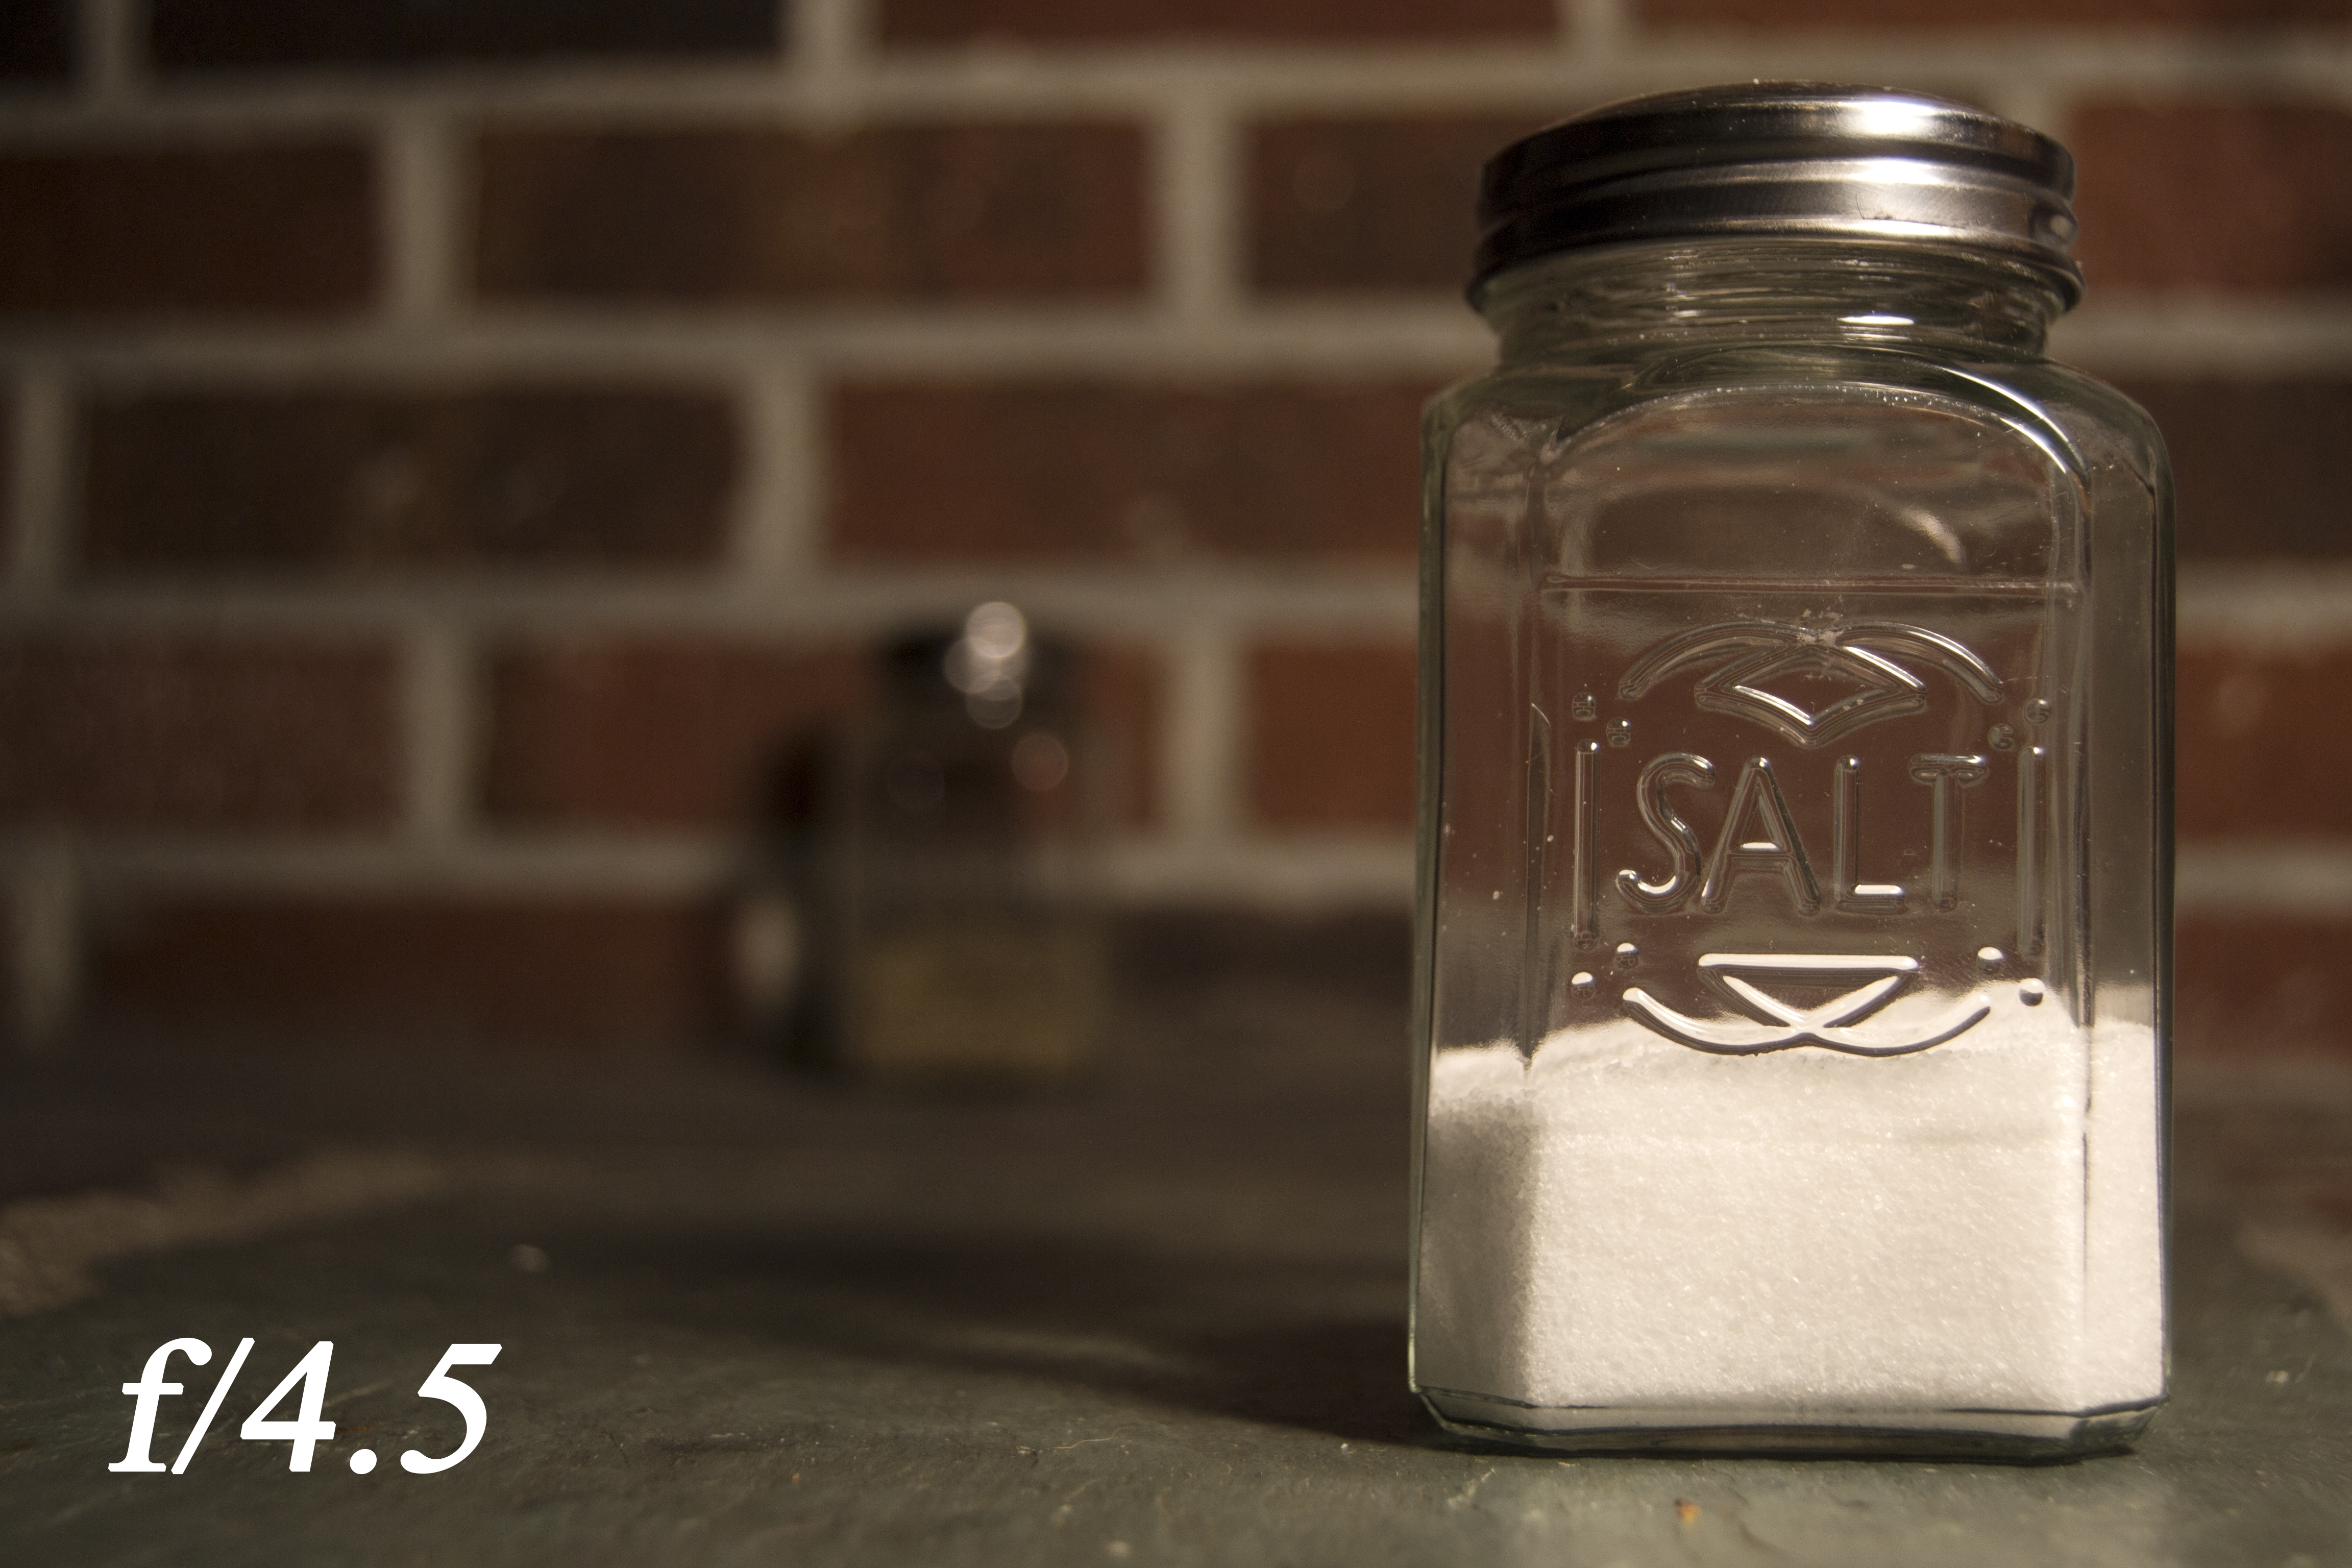 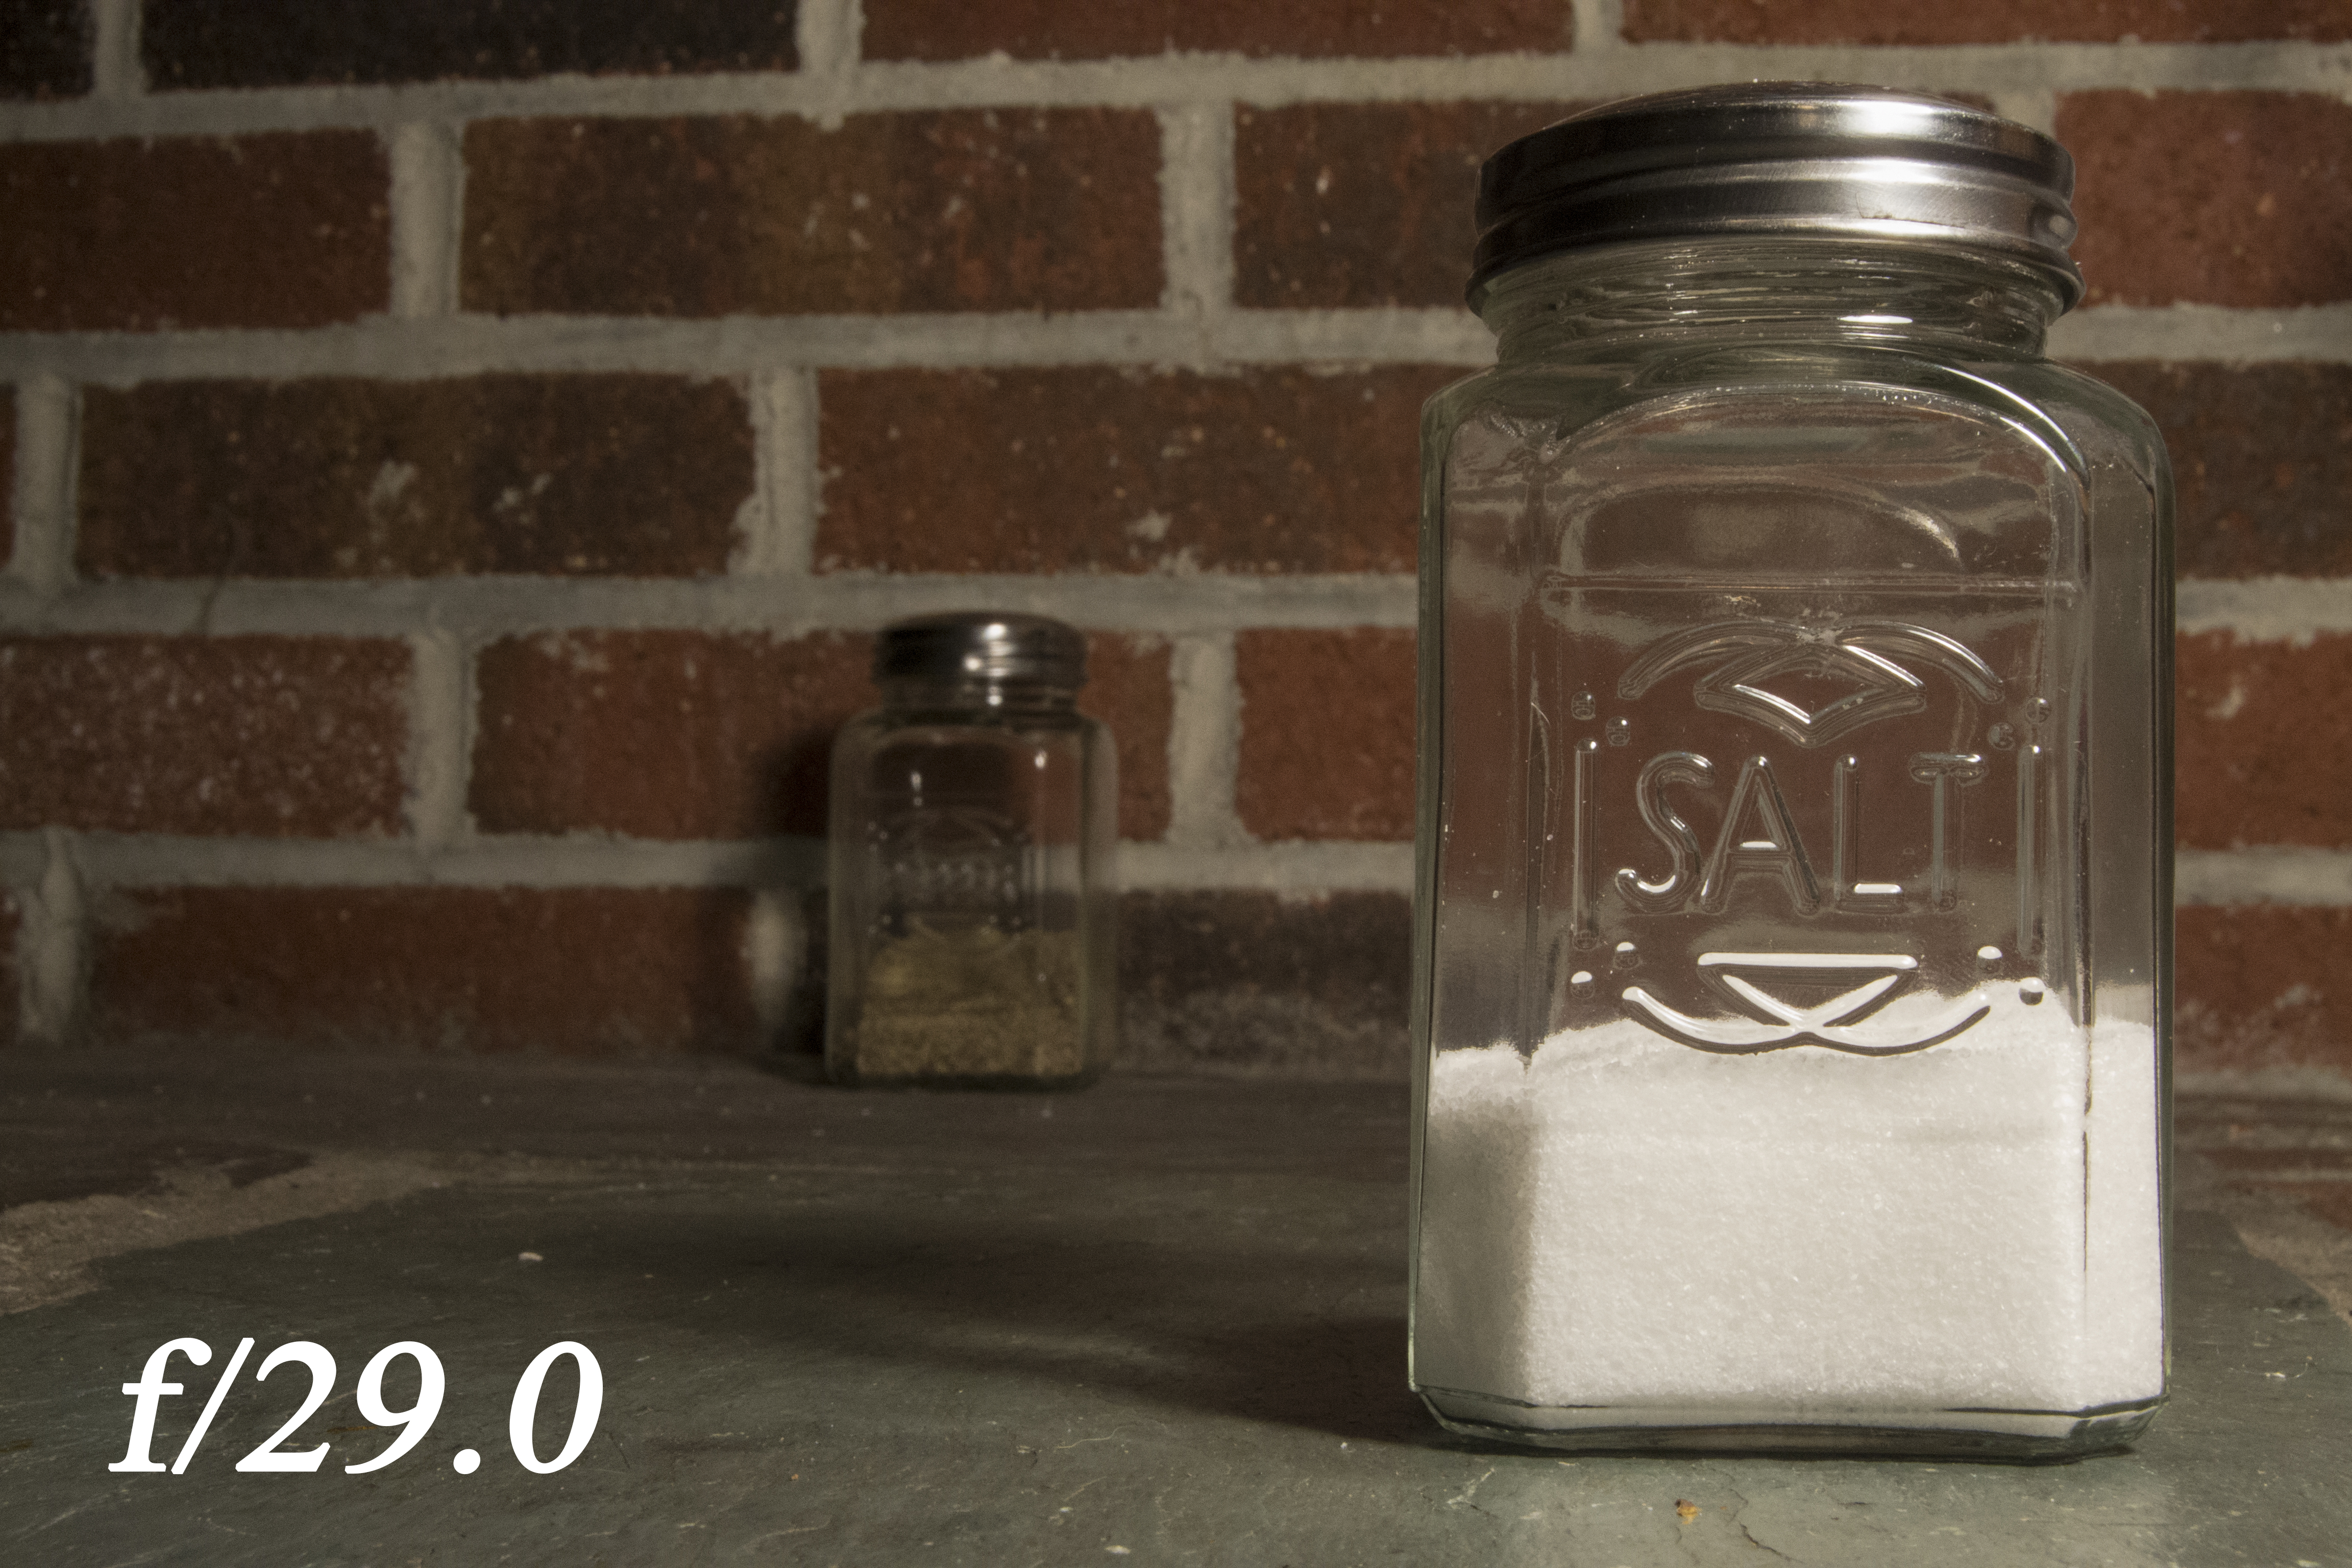 *Notice how the salt shaker always stays in focus while the pepper shaker blurs more with a lower aperture *Notice how the salt shaker always stays in focus while the pepper shaker blurs more with a lower aperture |
|---|
| Depth of Field: Simply put, depth of field (DOF) is how much of the image is in focus. The sharp and clear parts of an image are in focus and are a part of the DOF while the blurry parts of the image are not. DOF is most noticeable in macro photography because of the small subject and the really close focus range. |
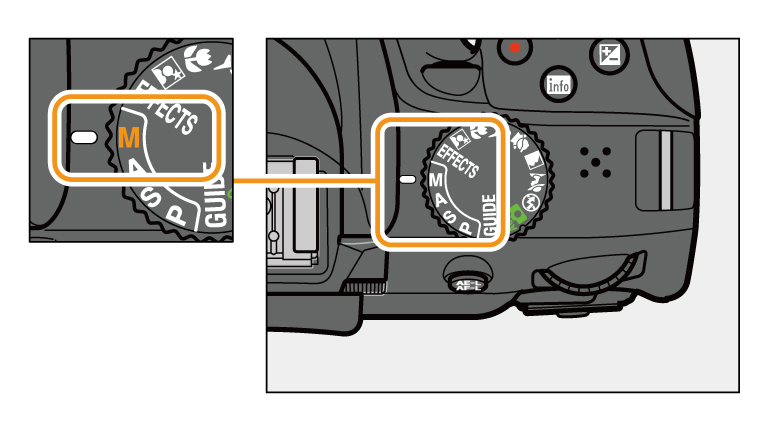
| DSLR Camera: A DSLR Camera is a camera that does not require film. DSLR stands for Digital Single-Lens Reflex. One huge problem with old SLR (film) cameras was that what you saw through the viewfinder, or the little window you use to see what you are capturing, was dramatically different from what was actually captured. With the new DSLR cameras, what you see through the viewfinder is what you capture. This is achieved by using only one lens and the viewfinder sees exactly what the sensor sees. One major advantage of DSLR cameras over SLR cameras is that DSLRs are great for beginner photographers because you don't waste film and can see a live preview of each photo. |
Exposure: Exposure is how bright or dark an image is. To change the exposure of an image, you can adjust the aperture, shutter speed, and ISO. A bright photo is considered overexposed while a dark photo is considered underexposed. You can determine the exposure of an image using the histogram (see next definition for more on the Histogram). See the photos below for an example of an underexposed, properly exposed, and overexposed image. 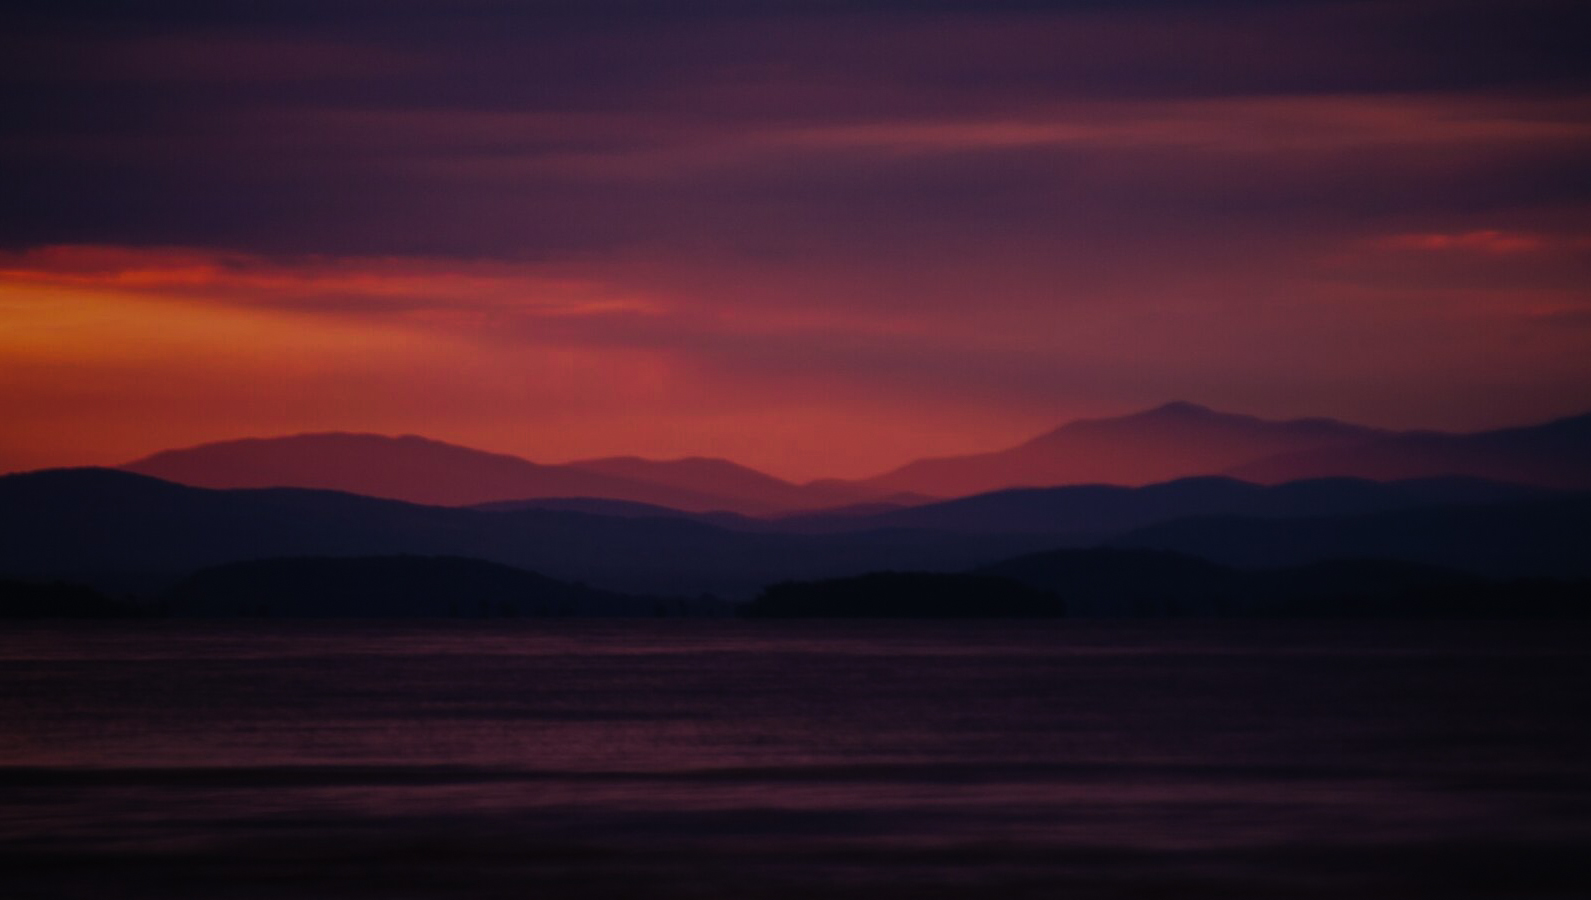 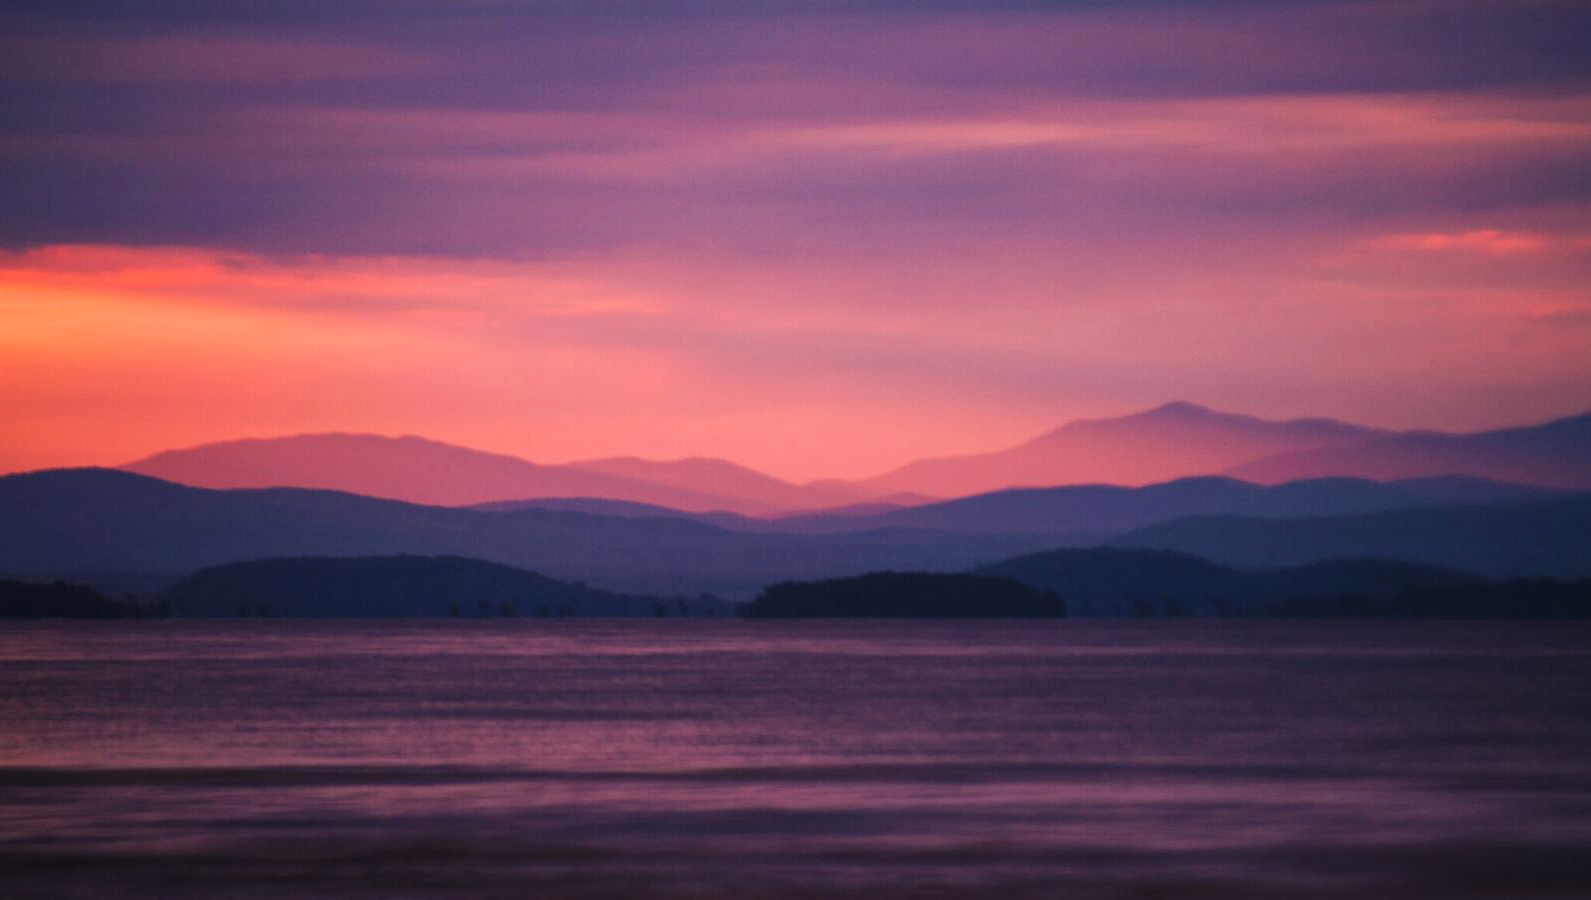 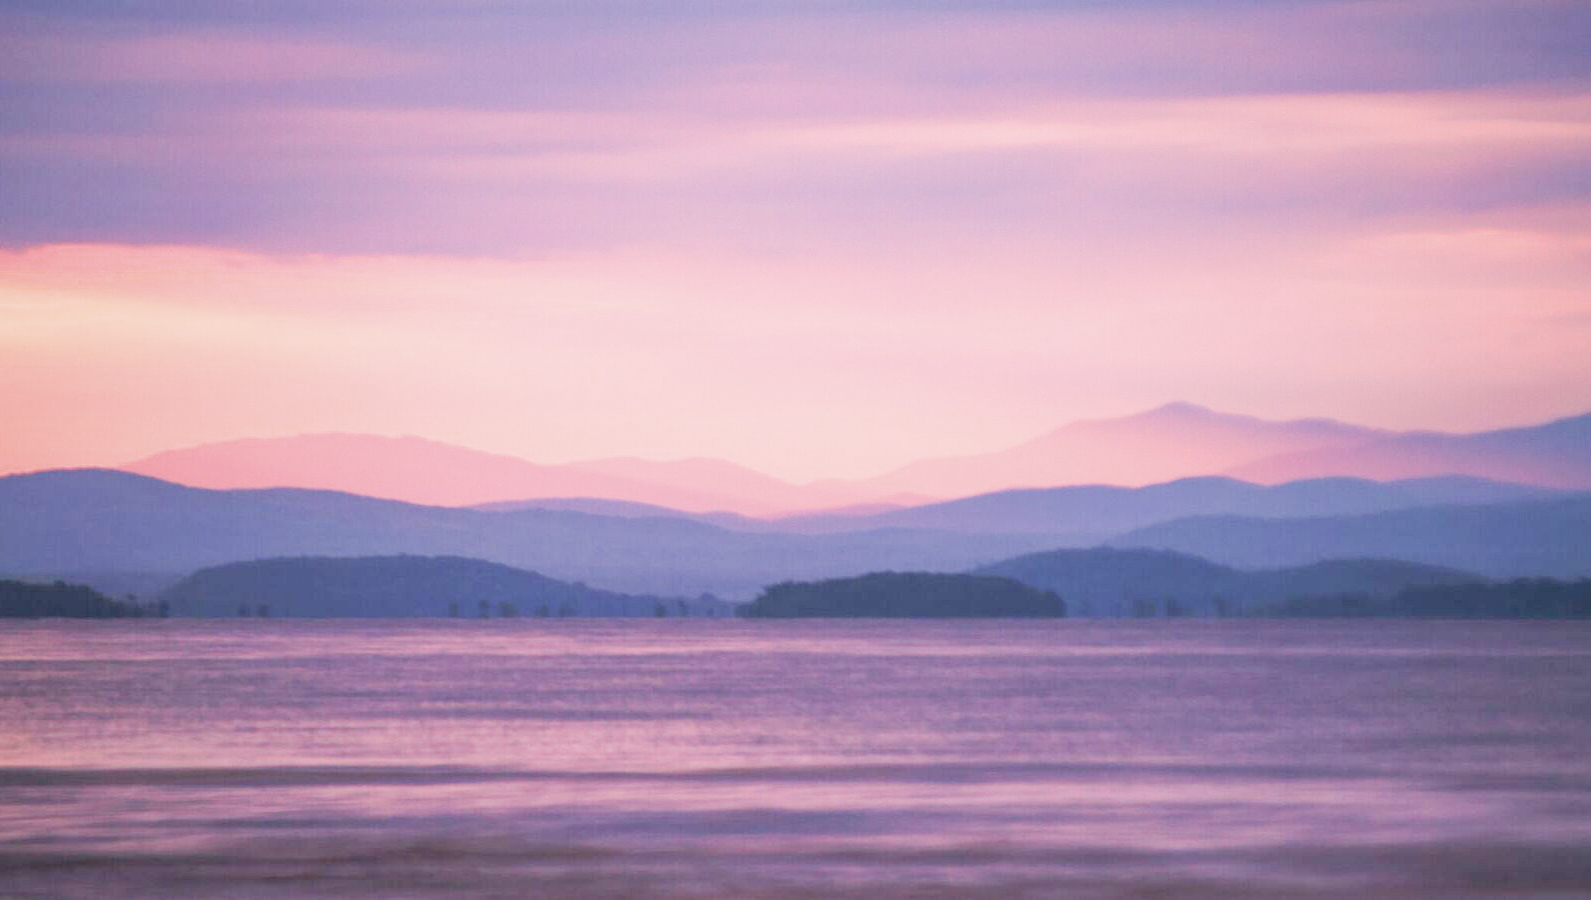 |
Histogram: A histogram is mainly used in post-processing but is also commonly found on cameras. It is a chart that shows the exposure of an image. The left side represents the dark pixels in a photo while the right represents the lighter pixels (and all the colors are in between). An image can either be underexposed (too dark), overexposed (too bright), or just right! To determine if your image is properly exposed, you have to look at the histogram. An overexposed image will be skewed left (the "mountain" on the right side) while an underexposed image will be skewed right (the "mountain" on the left) . Below are examples of an underexposed, proper exposure, and an overexposed image.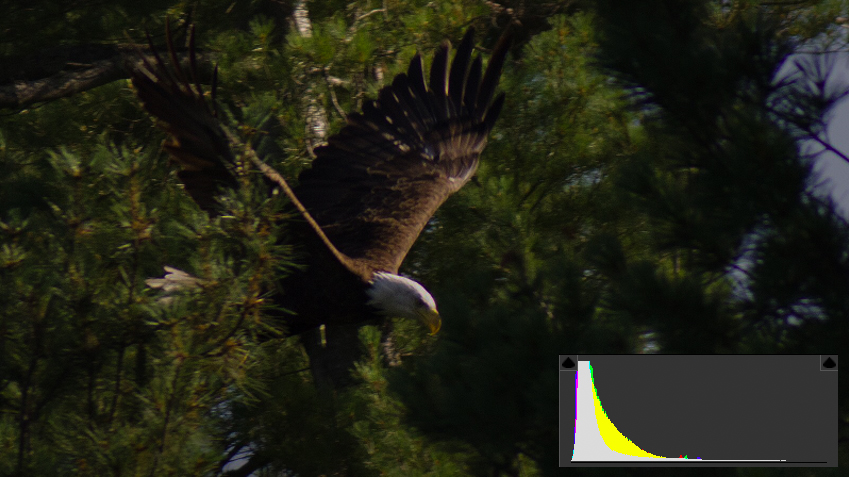  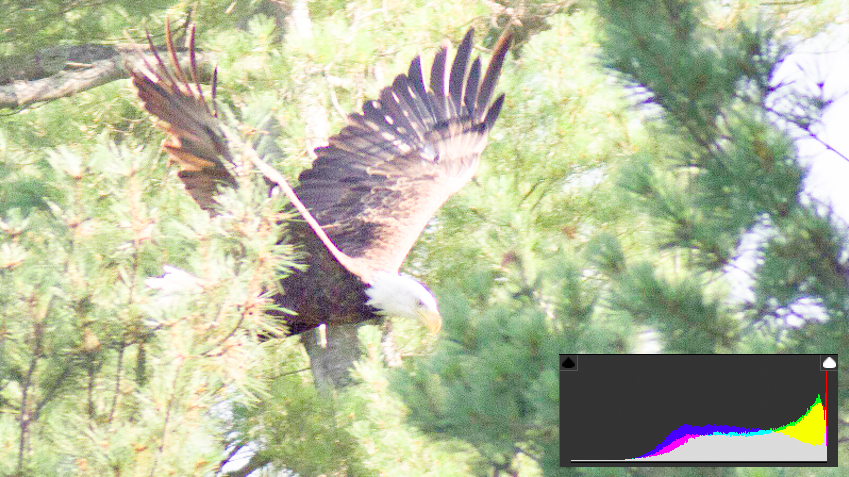 |
ISO: This is the third main setting that controls the brightness of an image. ISO is used to change the camera sensor's sensitivity to light. A low ISO (ISO 100) has a low sensitivity to light while a higher ISO (ISO 1600) has a higher sensitivity to light. 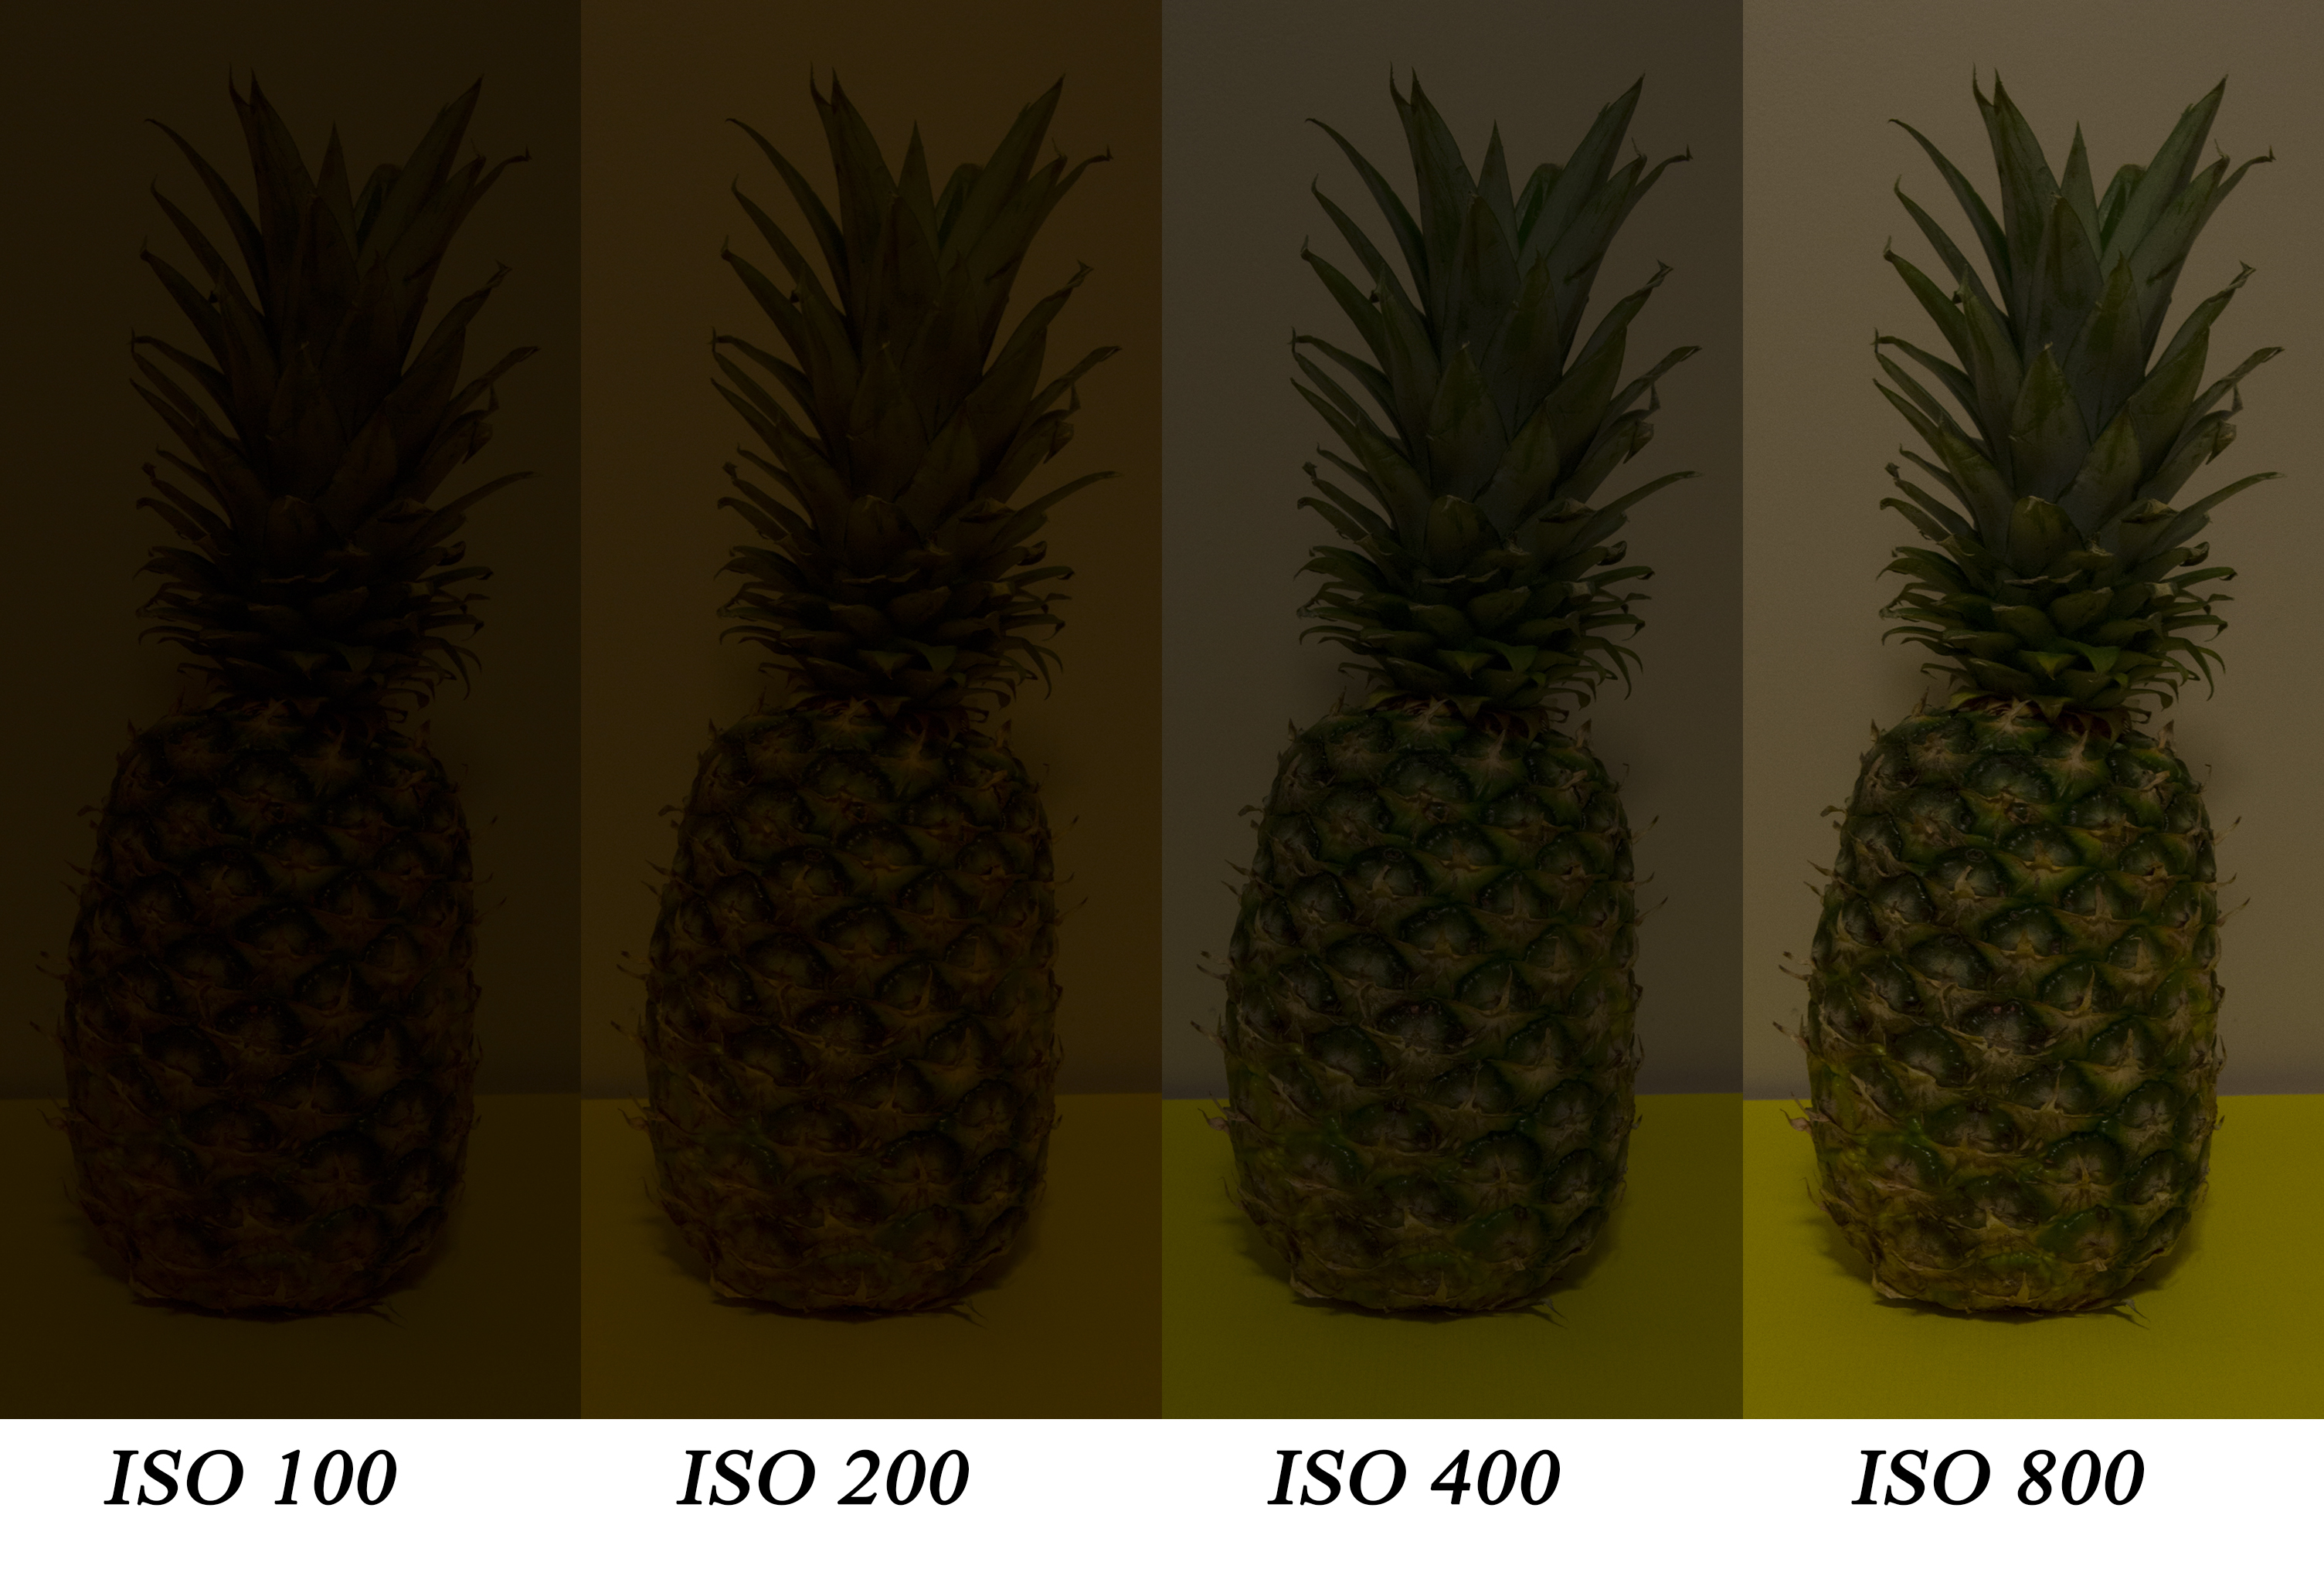 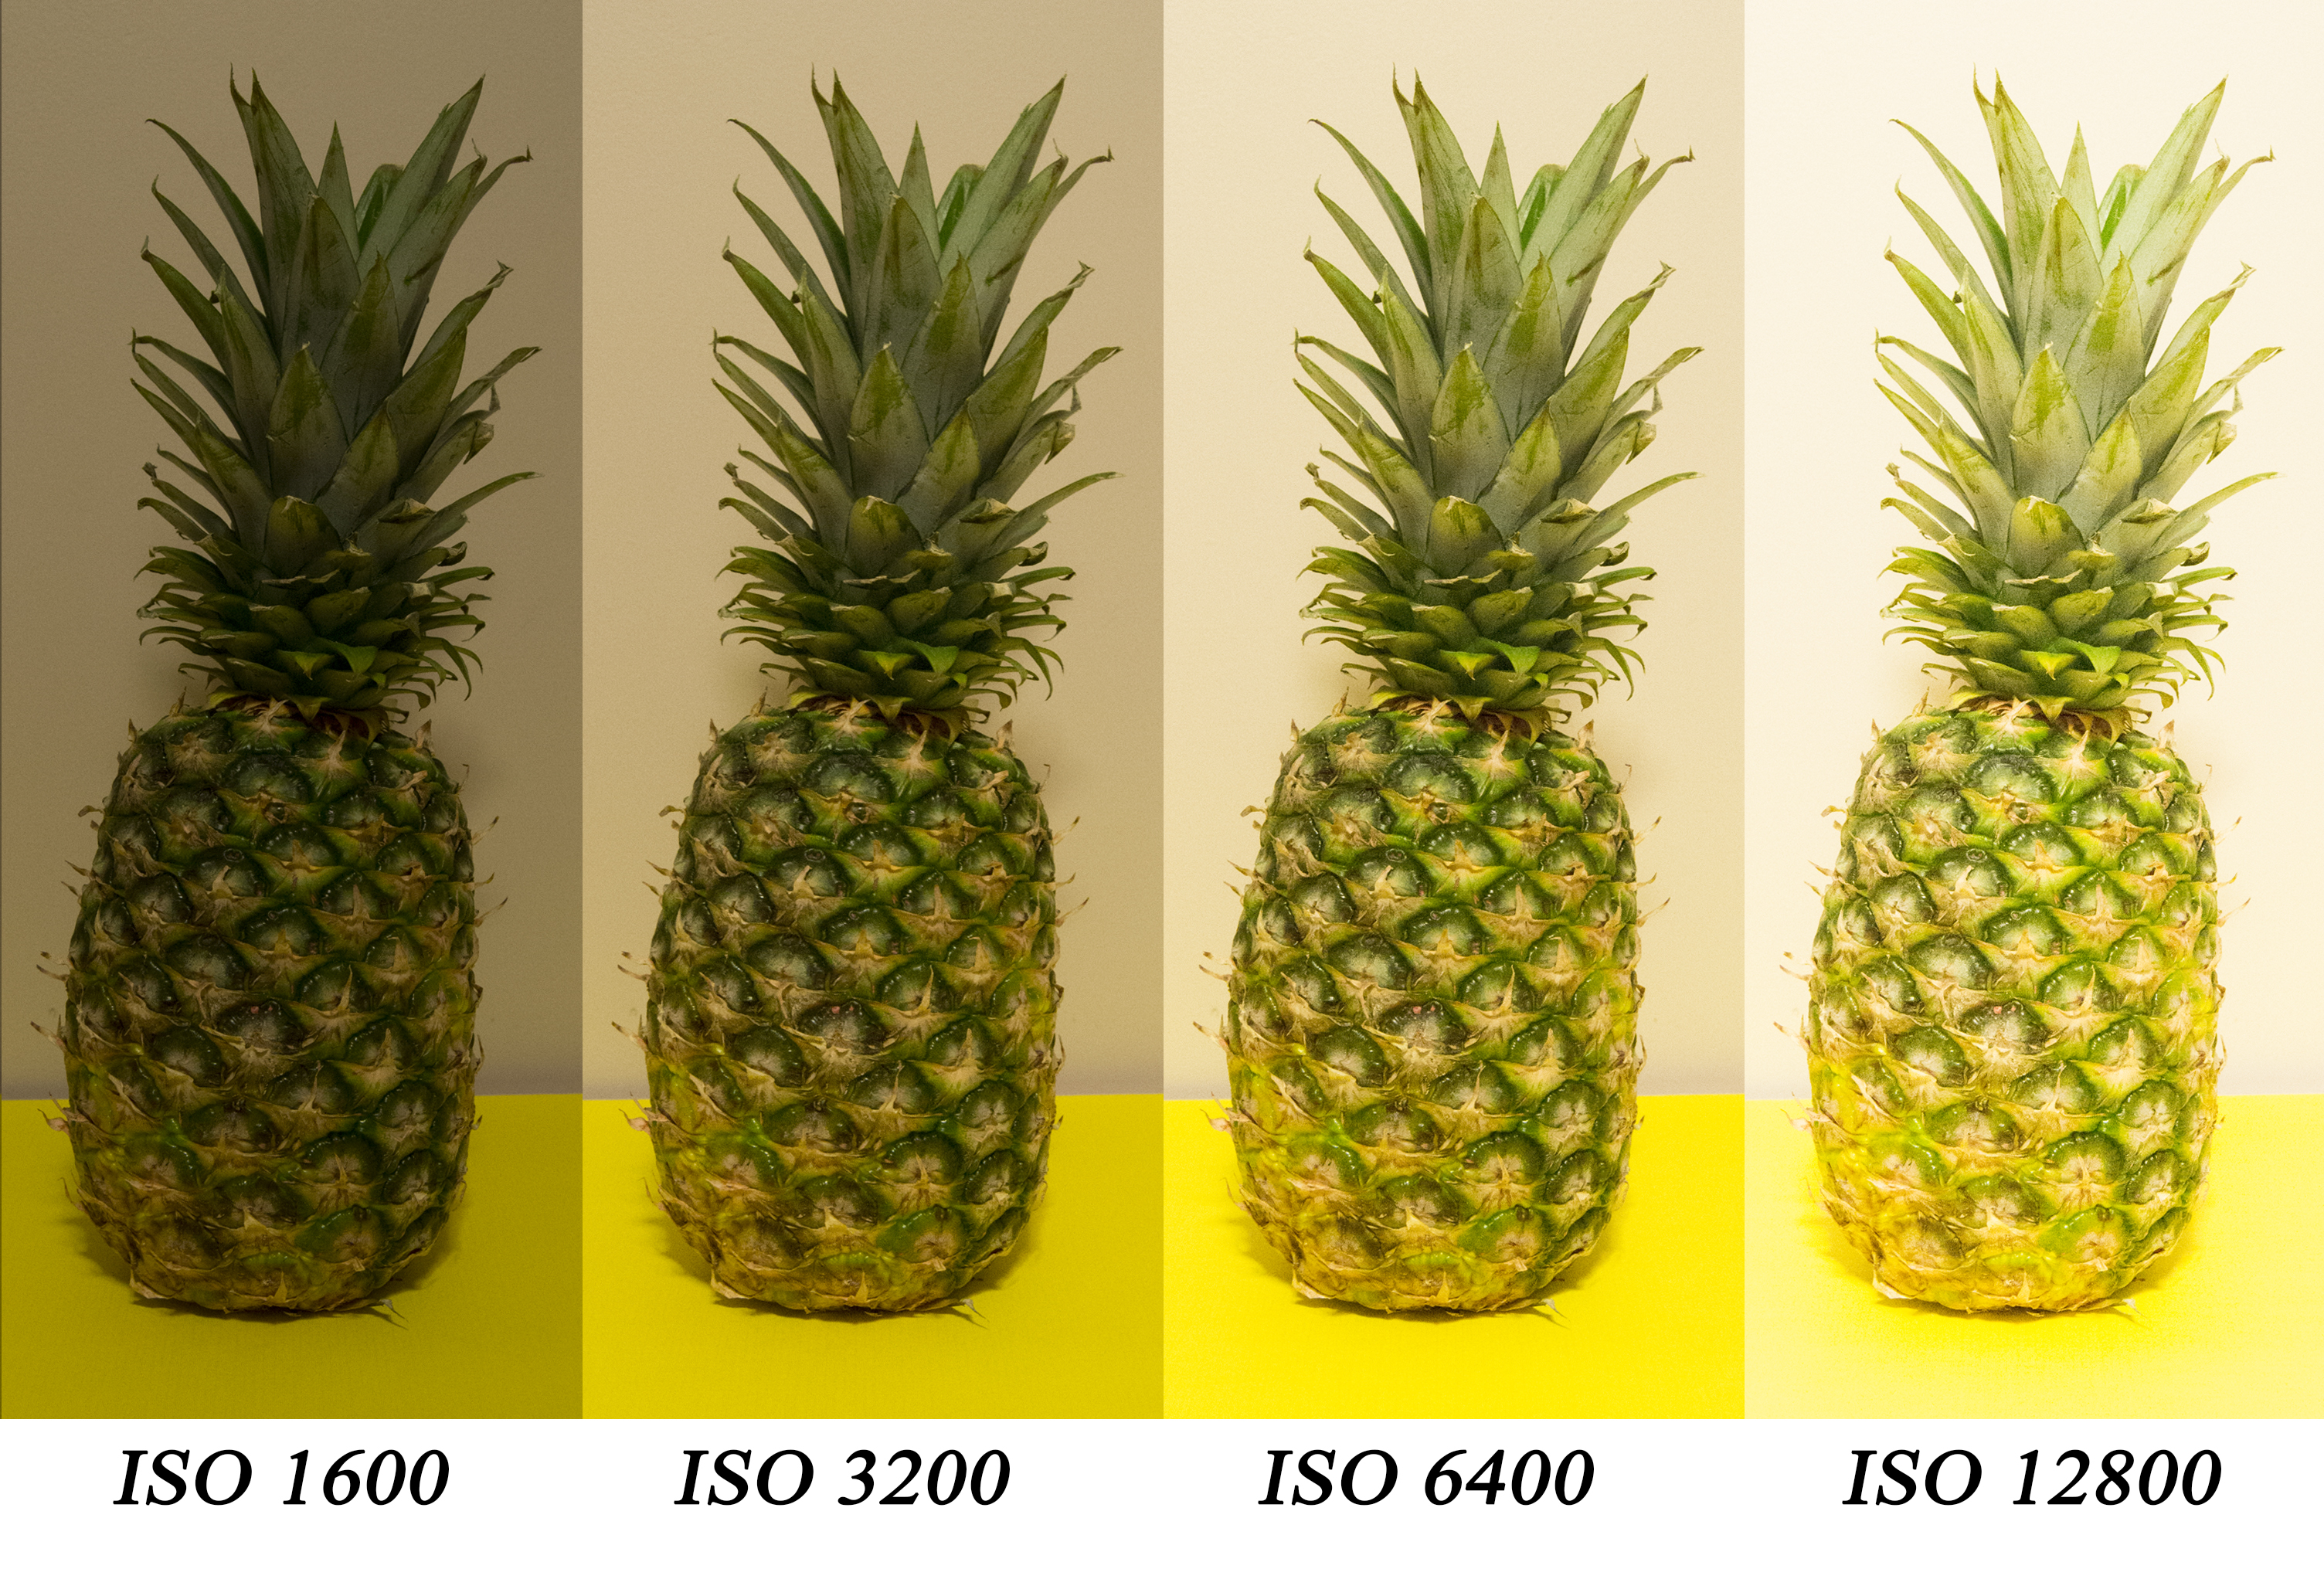 |
Noise: Noise is the grain an image has. It typically is a result of a high ISO in low light photos. An image with a lot of noise will not be as sharp as an image with minimal noise. As you can see below, the left image is smoother and sharper than the image on the right. In the image on the right I added noise using Photoshop to show what too much noise can do to an image. Too much noise results in a fuzzy and washed out looking image. 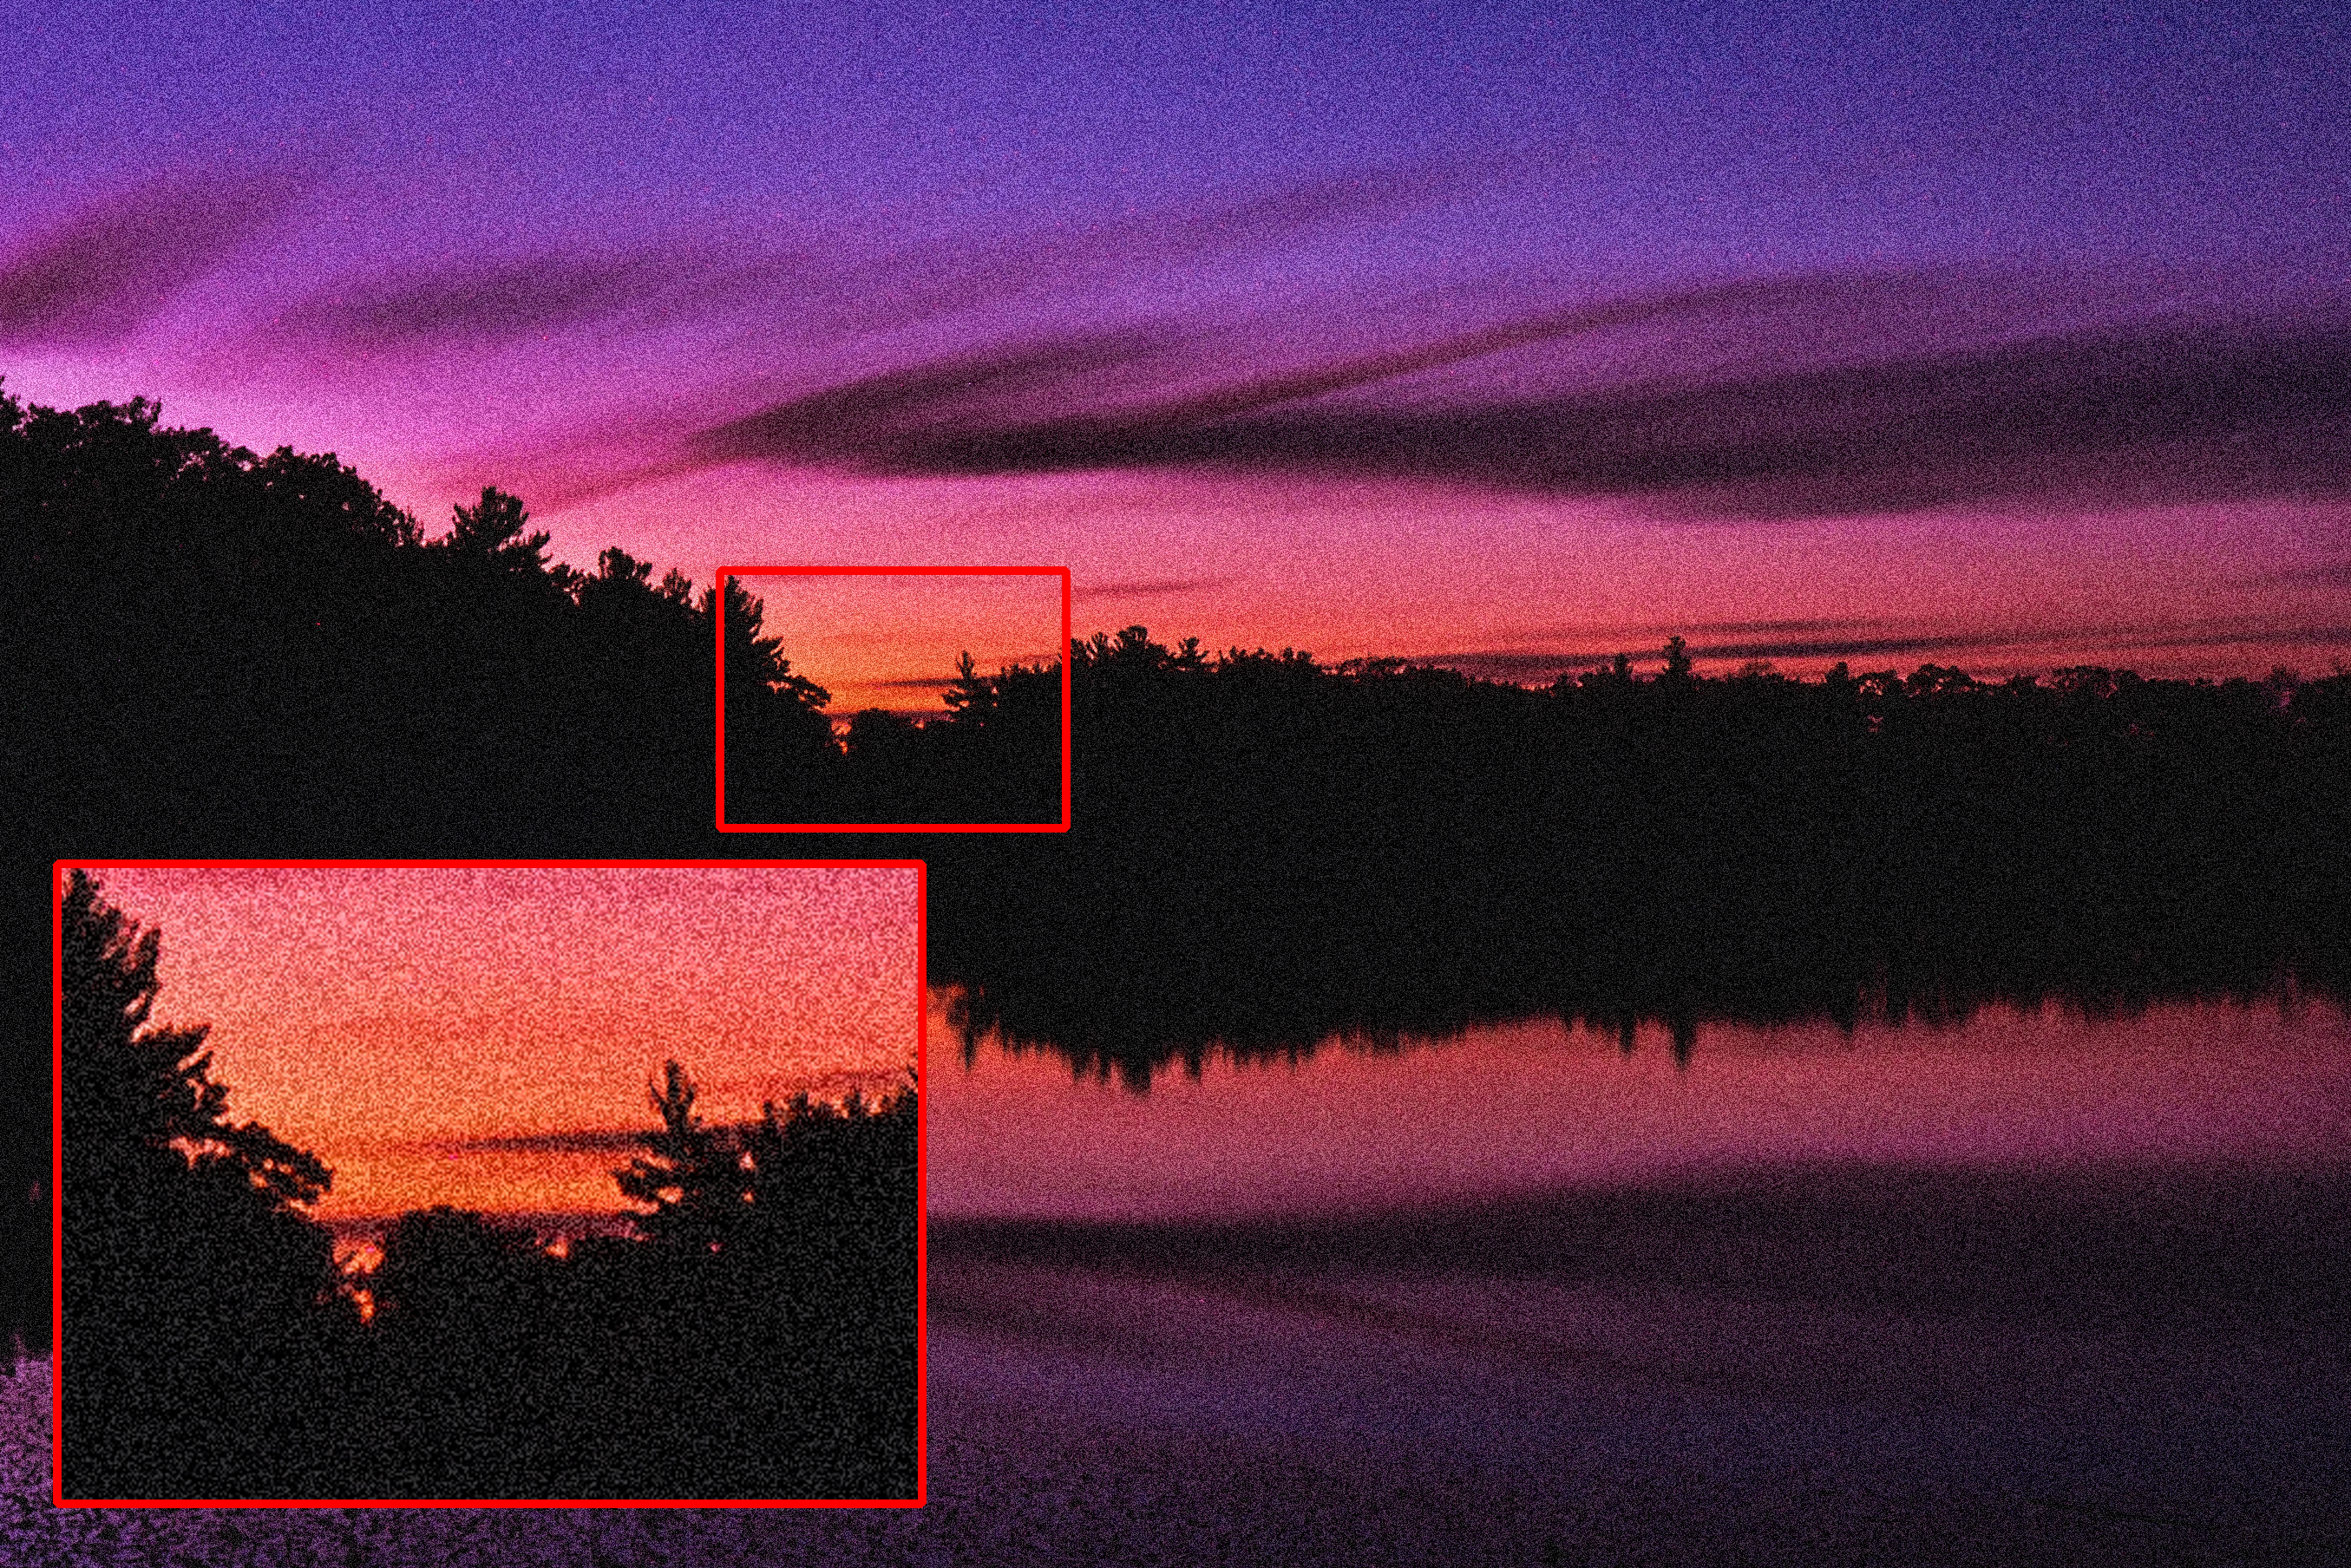 |
| RAW: If you are going to edit your photos after you take them, RAW is what you should be shooting in! RAW is a file type, like a .JPG or .PNG file, that allows for maximum flexibility in post processing. Some advantages of shooting RAW: more shades of color, higher image quiality, can fix under/overexposed images easier and more effectively, and much more! Some disadvantages of shooting RAW: takes up more storage, requires specialized software (like Photoshop or Lightroom) to open and edit, may take more time to edit the photo. |
| Shutter Speed: Like aperture, shutter speed is one of three camera settings that control the brightness or darkness of an image. Shutter speed determines how long the camera's sensor is exposed to light. A longer shutter speed will blur any motion and make the photo brighter if the aperture and ISO don't compensate for the longer shutter speed. Shutter speed is measured in seconds for long exposures (20s, 100s, 500s etc.) and fractions of seconds (1/2s, 1/500s, 1/1000s etc.) for most other hand held shots. For long exposures, you will need a tripod to steady the camera so the image won't have motion blur. A shorter shutter speed, like a 1/1000s photo, will result in a dark image because light only has 1/1000s to enter the camera. |